Perhaps, many years from now, people will look back at how the pandemic brought out the best and worst in us. I hope a subset of this exploration looks at craft in the time of a pandemic. In this forced retreat from society and self imposed isolation it’s been difficult to be productive let alone creative. Even still, some ideas have taken life and will exist on, into better and brighter times.

Lessons from the bench
It’s easy to cheat yourself out of experiences when woodworking. The crosspin is one of the more difficult parts of building a krenov plane. Some will elect to just use a dowel, others will create a jig and use a plug cutting bit. I tried and failed with a plug cutter multiple times. It’s a fussy setup and I never could get it quite right. This pursuit of efficiency and repeatability came at the cost of developing hand tool skills. Filing square to round and trusting your hand and eye. Took it slow tonight and did it right way, all while listening to an excellent podcast by www.handtoolbookreview.com. Check it out.

X marks the centre spot

Defined the shoulders with 4 quick cuts on the bandsaw.

Slowly taking down the corners

Hard corners, soft edges

Finished the shaping and refined the fit.
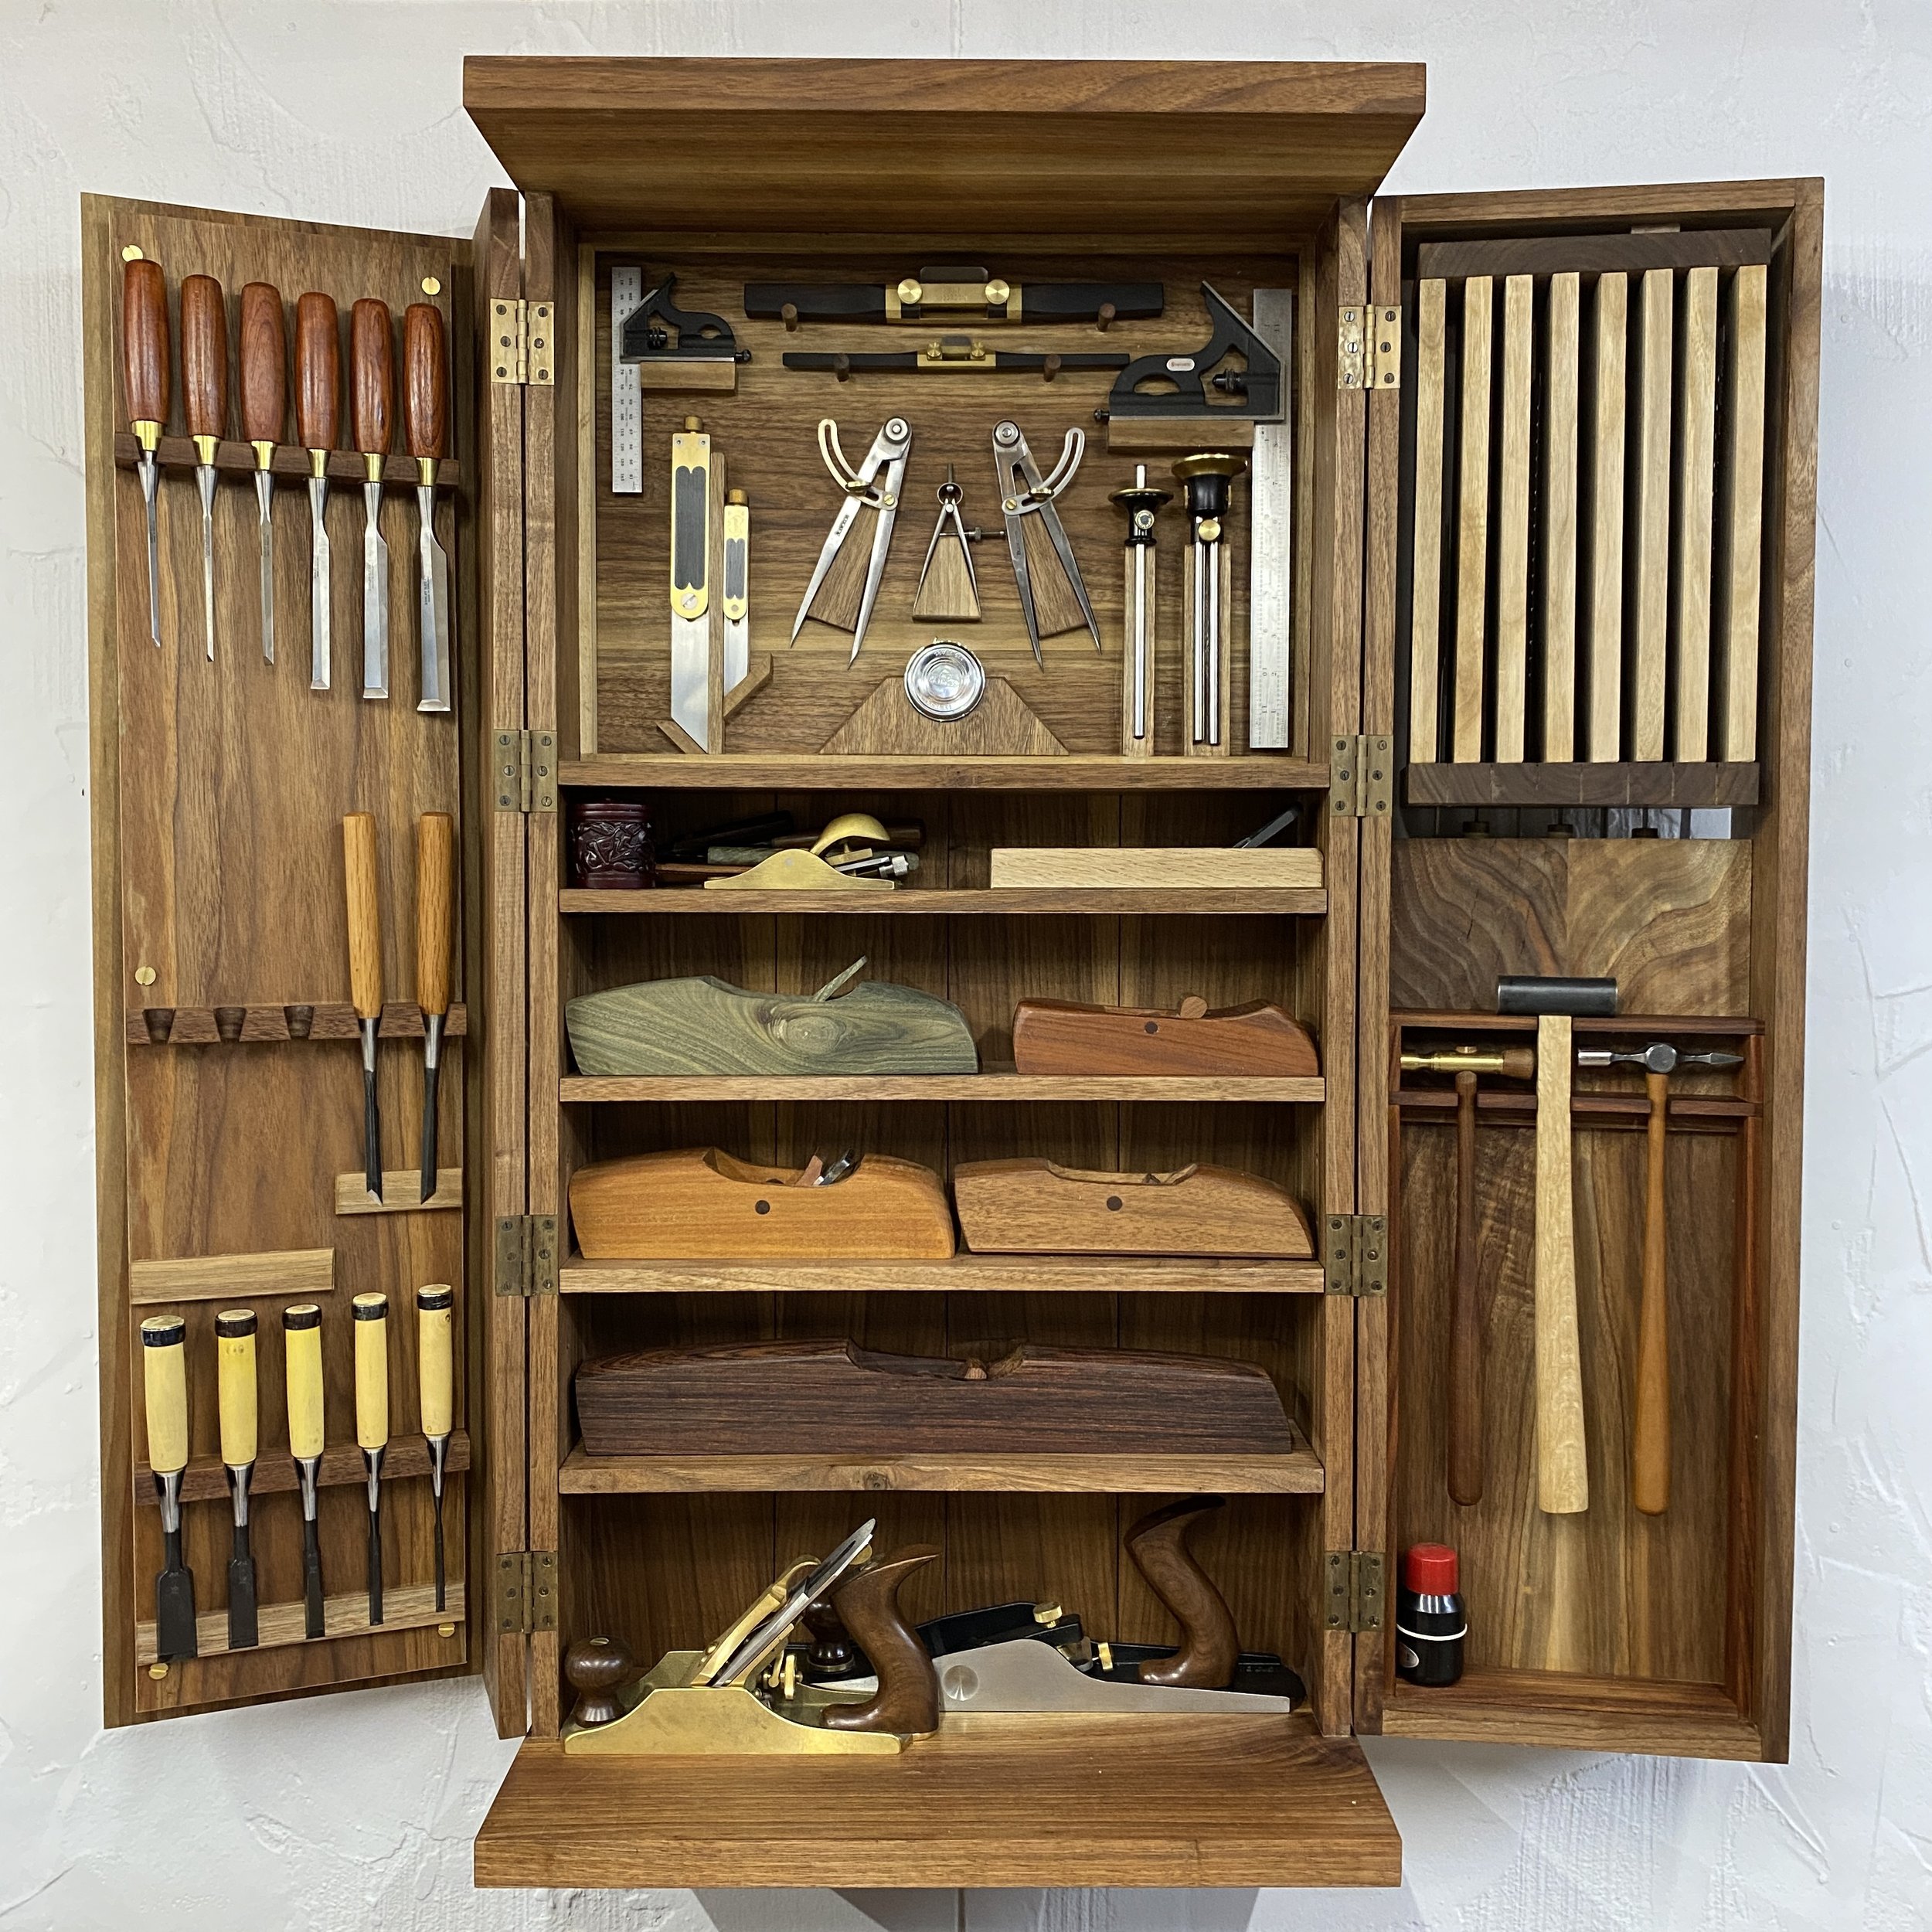
A Hand Tool Cabinet
Time for another right of passage build and this one’s a big one, a wall mounted hand tool cabinet. I’ve given the design and tool selection a lot of thought but I’ll save that commentary for another post. First things first, the shop needed a good tidy and my wood rack need some kondofication.


The first cut is alway a big one. The makita had just enough depth of cut to get through this.

Edge ripped. Caught the poor positioning after taking this photo and moved the slab to avoid cutting into my workbench.

This slab is going to be too wide for my jointer, time to break out the No.7 and get to work. Once semi-flattened the planer should be able to do the rest.

I’m really enjoying the color gradient of this walnut. I think I’ll use this particular slab for the frames and panels.
Stay Sharp
I’ve been away for awhile, this year has been exhausting which has sapped my energy for extracurriculars. Things are normalizing now, to whatever has become this new normal and there’s a long winter ahead. I needs something keep me busy and not slip into a sedentary hibernation. I’d like to try my hand at building a nice tool cabinet, however the state of my shop and tools need a little attention. This little lie nielsen sharpening jig was a good project to ease back into it. Next will come a few more krenov planes, easy to knock out while the wood is acclimatizing. And then on to the cabinet.


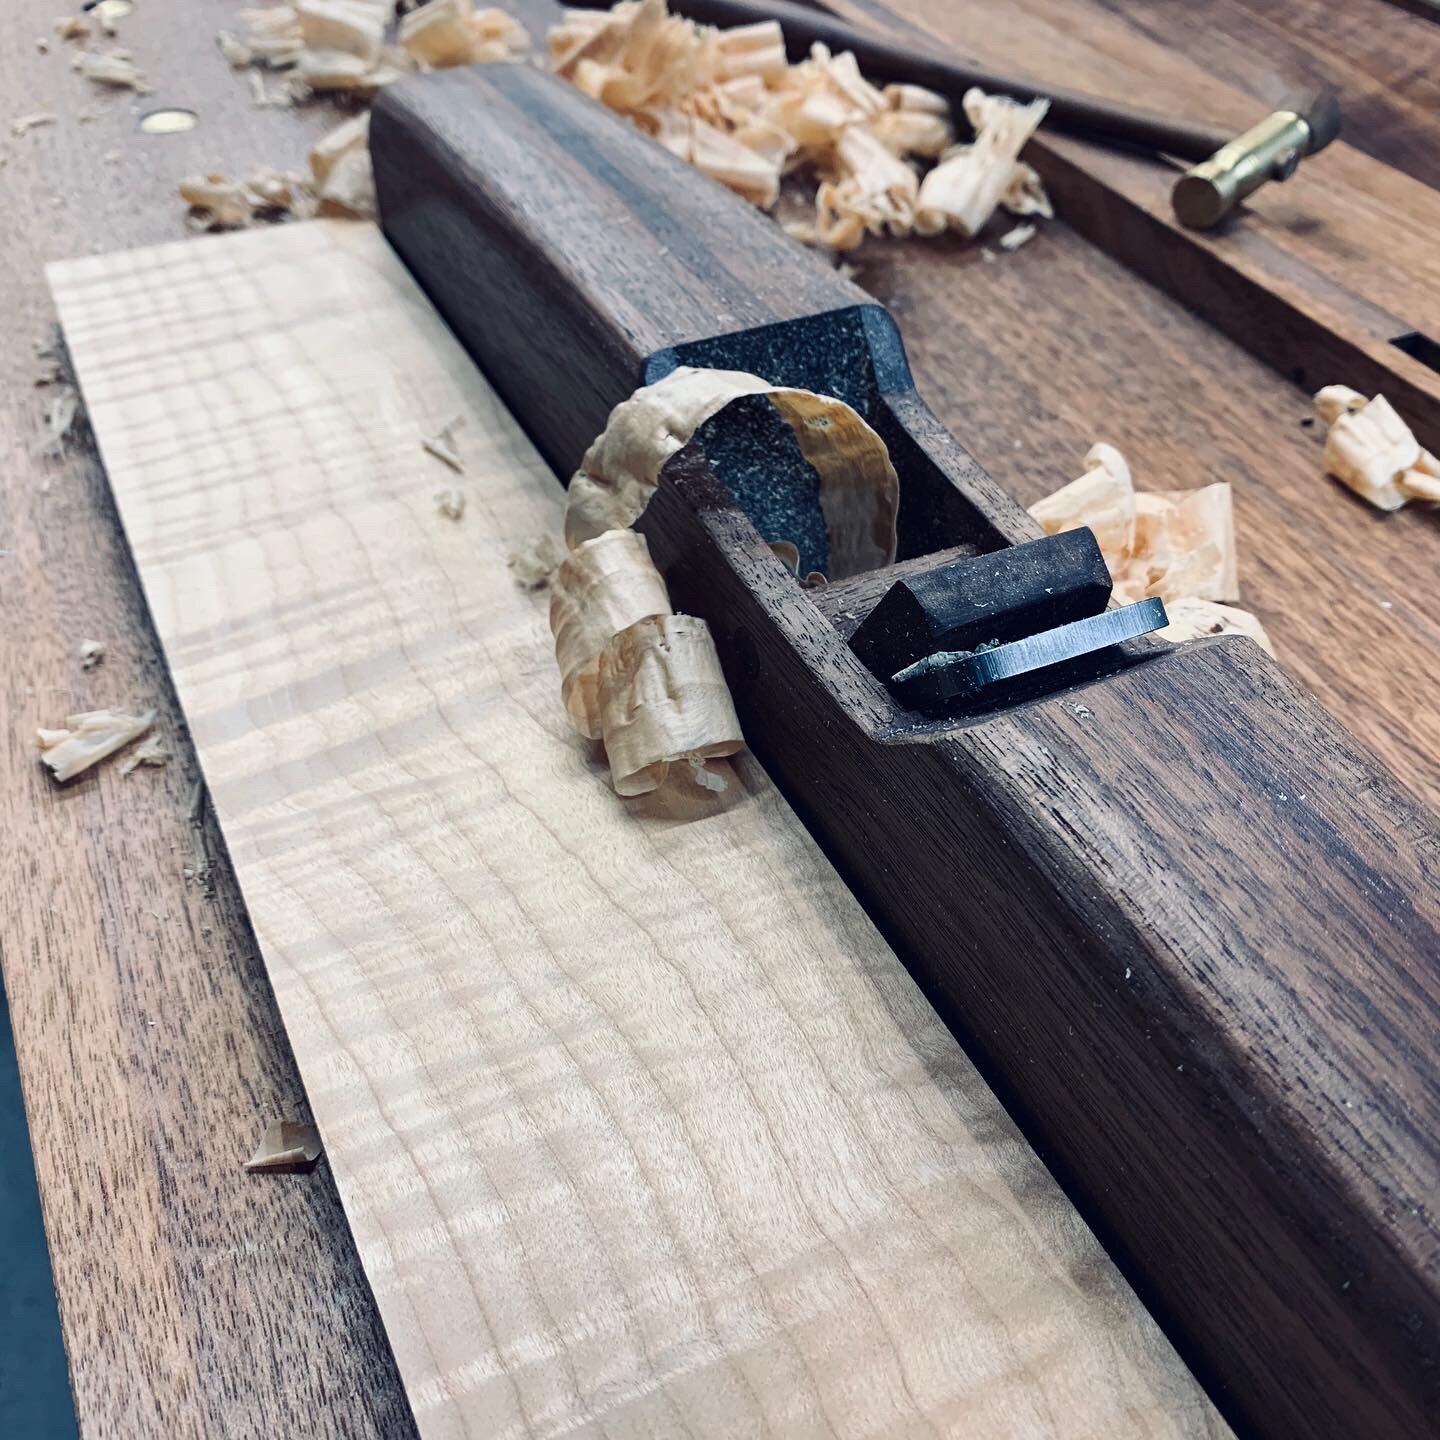
Offcuts
There’s something deeply satisfying about making your own tools. After finishing the bench build I was left with a good sized offcut, which I decided to use to make few krenov style planes. This one’s a jointer which is just over 19” long. I’ve laminated a pau ferro sole for durability and bedded the iron at just over 45 degrees. Decided against a chip breaker, as I wanted to keep it as pure as possible… besides I have a distaste for routers and didn’t want to mill a slot for the chipbreaker screw. I’m able to plane figured maple glass smooth so i’m not too concerned about tearout issues. I’m particularly happy with the form and I plan on making a smoother and coopering plane in the same Art Deco speedster style.


A Means To An End
I’ve been building this bench for so long that I’m a little sad to see it come to an end. It strange, usually projects tend to drag towards the end but this one really accelerated, so apologies for cramming a lot into this last update.
It’s been a challenging build but also a rewarding one. What i’ve liked most is that some elements have just fallen into place. The asymmetry in the top was dictated by the size of stock I had on hand. The two piece top was made of 4 beams, one was a good 7” wide and the rest were a little smaller. I used the 7” piece for the front as it was widest and it didn’t make sense to rip them all to a common width just to have the centre gap land right in the middle. I actually really like the fact that the work surface at the front totals 13” at the front and just over 8” at the rear. I also really like the fact that the 7” beam worked out to be exactly the same width as my sheldon vise. This really helped with the installation. The material for the legs had its fair share of structural defects, but all were addressed through epoxy reinforcement. It worked out to be kinda neat that I had enough material for 4 gnarled legs and 1 clear top. Without getting too mystical, in some ways i feel the bench build itself. Or at least dictated its final form. Anyways, on to the picture show.

The top was a bear to trim. I was able to make a kerf cut with my track saw but i still had 3” or so to hack through.

Man this was tough work. I nicked my fingers several times with this Ryoba, should have taped the edges….

I used miller dowels to secure the ledgers for the bottom shelf. Didn’t have to but if anyone ever looks up my skirt they’ll see a craftsman.

Next, on to the shelf boards. The veritas small plow is a finicky beast, can’t say i’ve mastered it but i was able to fiddle with it enough to get it plow an acceptable tongue and groove.

I find this type of work to be some of the most pleasurable. Light chamfering with an apron plane and a chisel.

Here she is, in the raw. Still needs a good danish oil bath and a few dog holes.

Made a quick jig to drill the dog holes straight and true. Lee valley sells this 3/4” brad point bit and 1” bushing, they make things easy.


On to flattening. You can see here the front beam lamination was slightly proud. All in all everything was sitting relatively well and it didn’t take too long to get things dead flat.

Full length shavings tell me I’ve found true flatness.

And when everything’s said and done here she is.

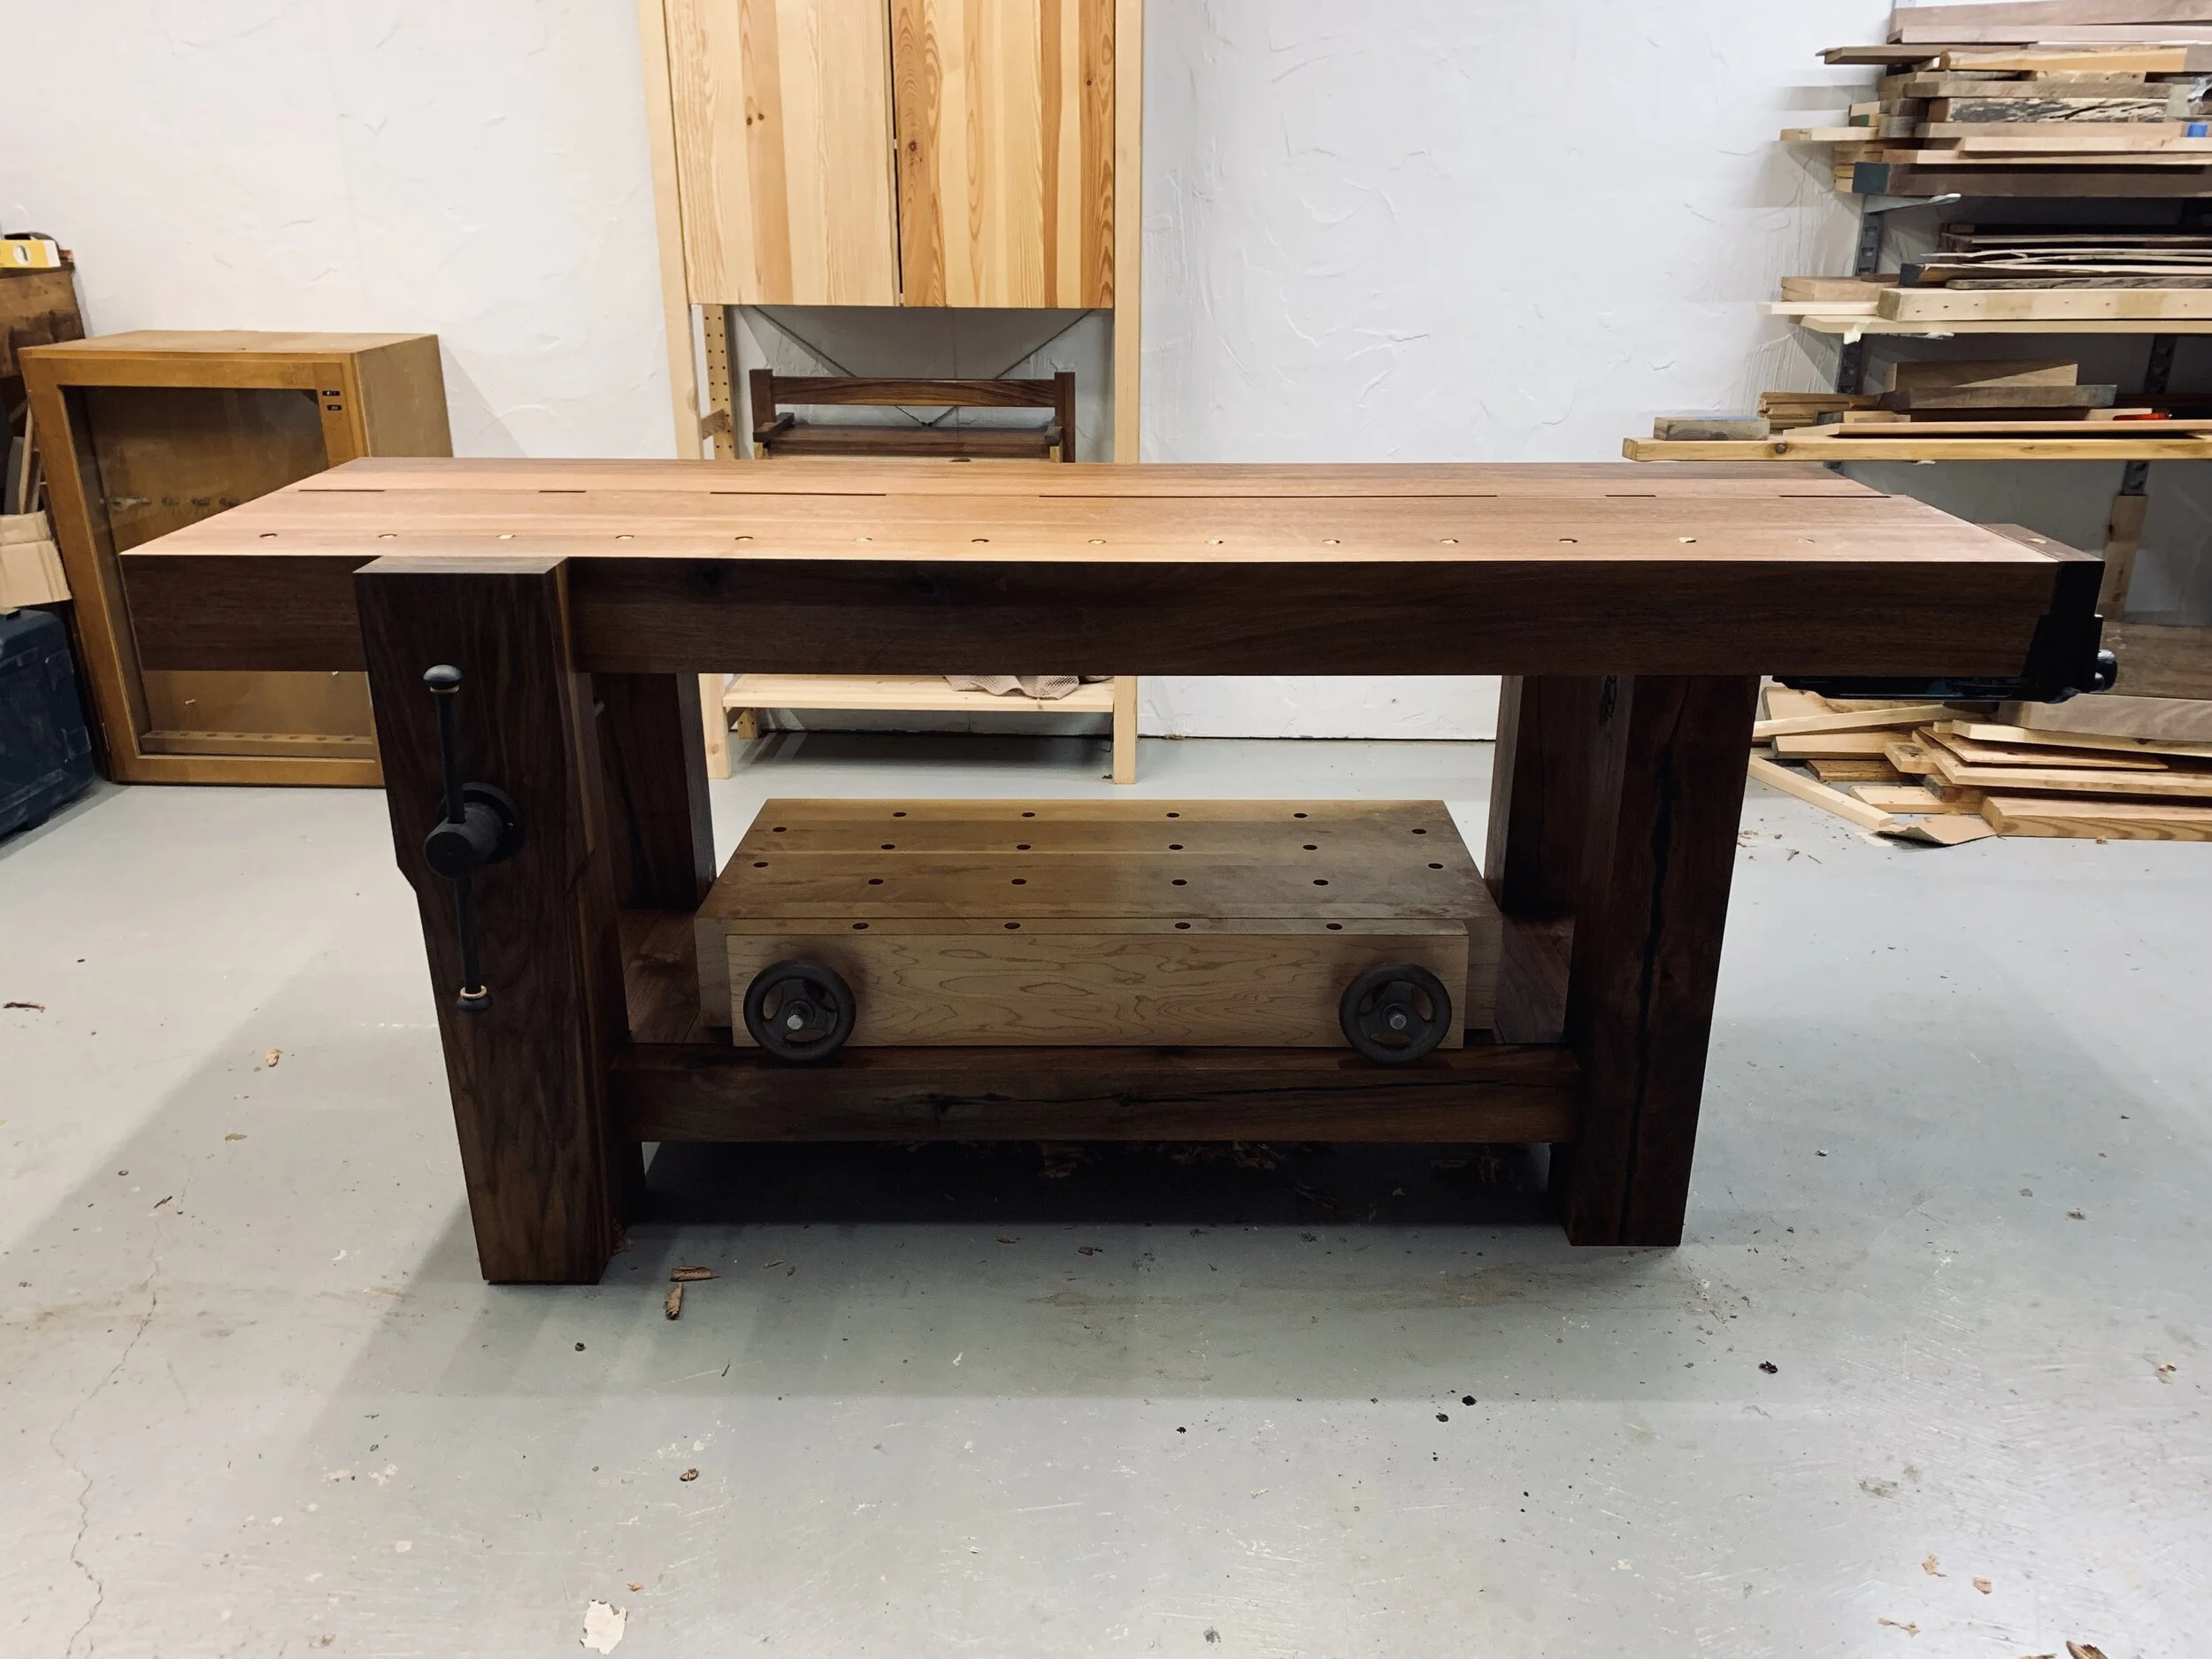
Another roubo workbench enters the world, built with wakened hands & built for a lifetime or two.
The Upside
Tonight I flattened the underside of the bench top in preparation for the leg tenon mortises. Having the legs and stretchers flipped showed what could be a potential problem. I think I erred in only laying out a 3/4 inch shoulder. Since the legs will be more or less flush with the bench top this doesn’t leave much wood. Actually I’m fairly confident it’s enough but I’m also sure it’s one of those things that would gnaw at me over time. So to sleep better at night I decided to enlarge the outside shoulders a little. It was a good excuse to use my florip rip saw, however a ryoba was still needed for the crosscut.


Real Time
Legs have been scraped smooth, the grain is just wild, can’t wait to oil them up. To move things along a little, I’ll start posting from my mobile. You’ll get to see this build come together in real time.


Overdue
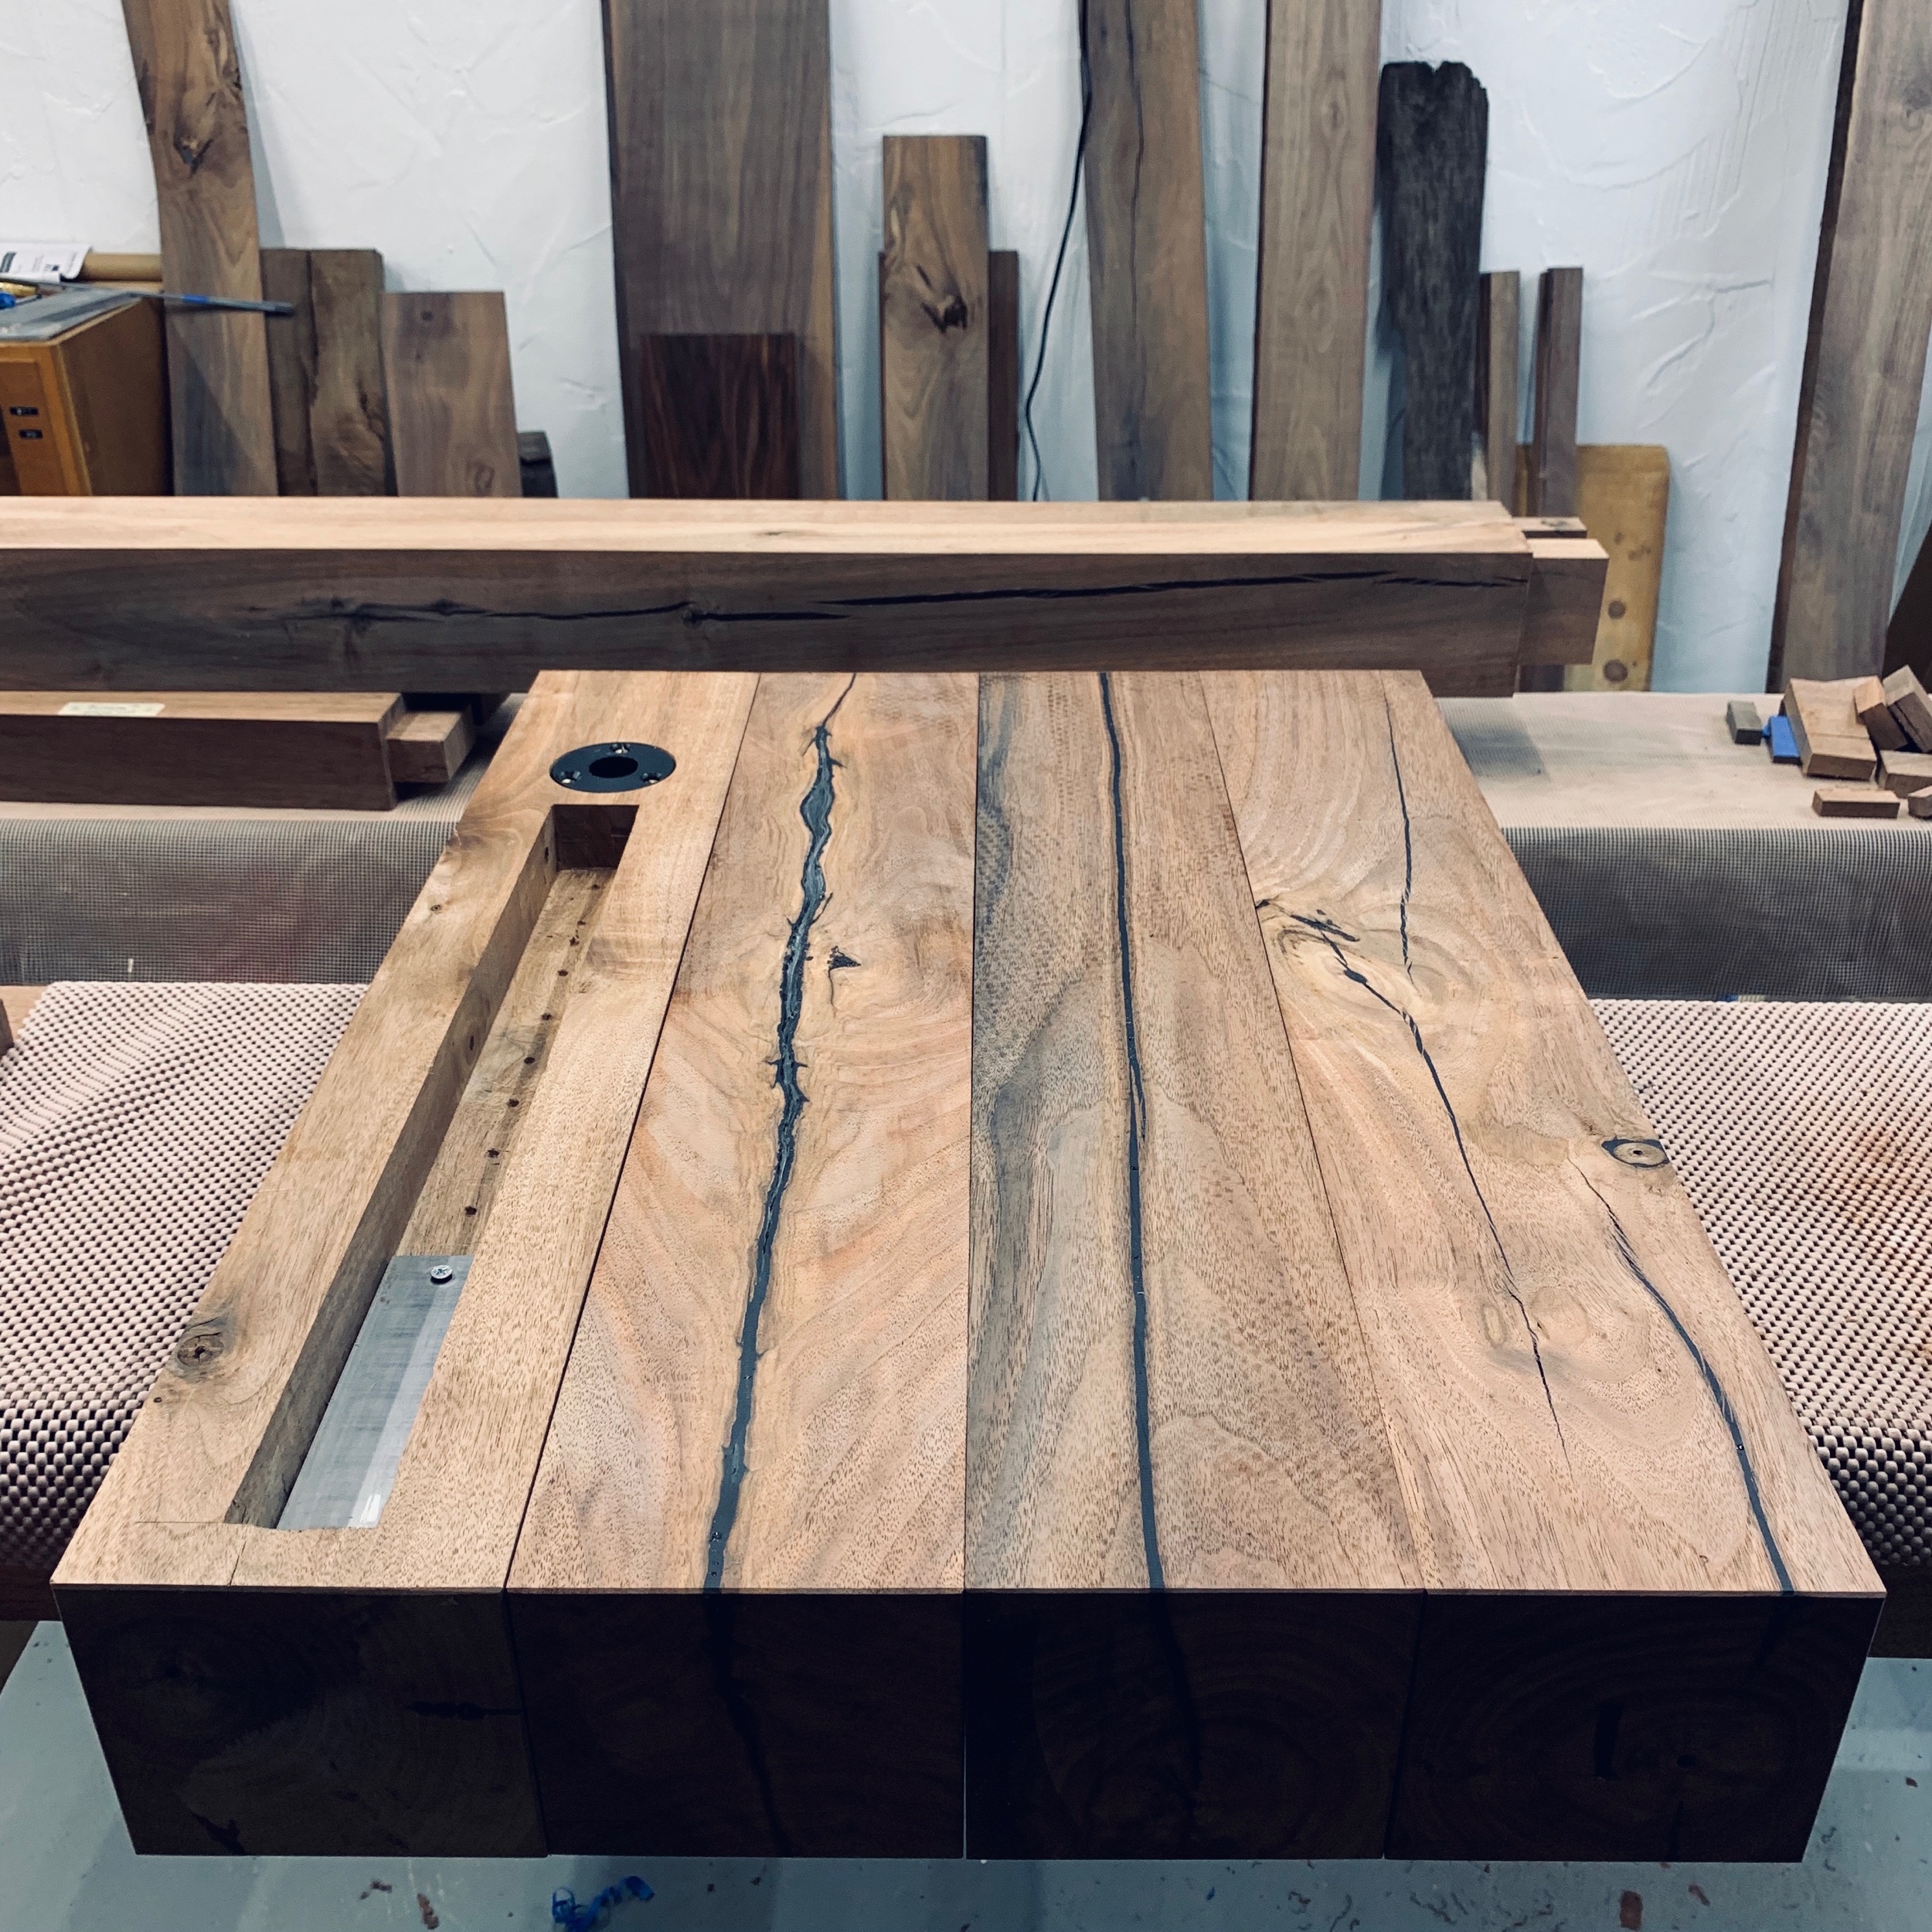
I’ve neglected updating for some time but the pace has picked up and I’ve made substantial progress. I’ve also made a few big decisions… I was going back and forth between on whether to go with a split or solid slab for the top, each has pros and cons but ultimately an asymmetrical split top design won out. A few considerations came into play, number one being mobility. Having just moved to a small town with my family, I have very few people to help out in a pinch, especially with a giant slab of walnut. There’s also an air of self sufficiency around these parts, which I guess will be reflected in this work. I’ll go it alone and manhandle it across the finish line myself. The second has to do with design itself, I figure there’s no real need for a sliding deadman if I can simply put a clamp in the split and secure the end of the board against the front of the bench top. Not having a sliding deadman will cut down on the complexity (and time) of this build substantially. Especially since my front stretcher is inset an inch and is not flush with the front legs. My original idea was to use a cam clap and a sliding block design for the deadman, the block would take up the 1” gap and would be a pretty elegant solution to this problem… but hey a clamp and the split is cleaner and simpler. Often the simplest solutions are best and the more elegant a solution the more beautiful. Maybe the deadman would just be clutter? I still like the idea of the cam clamp and I think I’ll use it with the gap stop and tail vise for a sliding batten system. Anyways, on to the pictures.

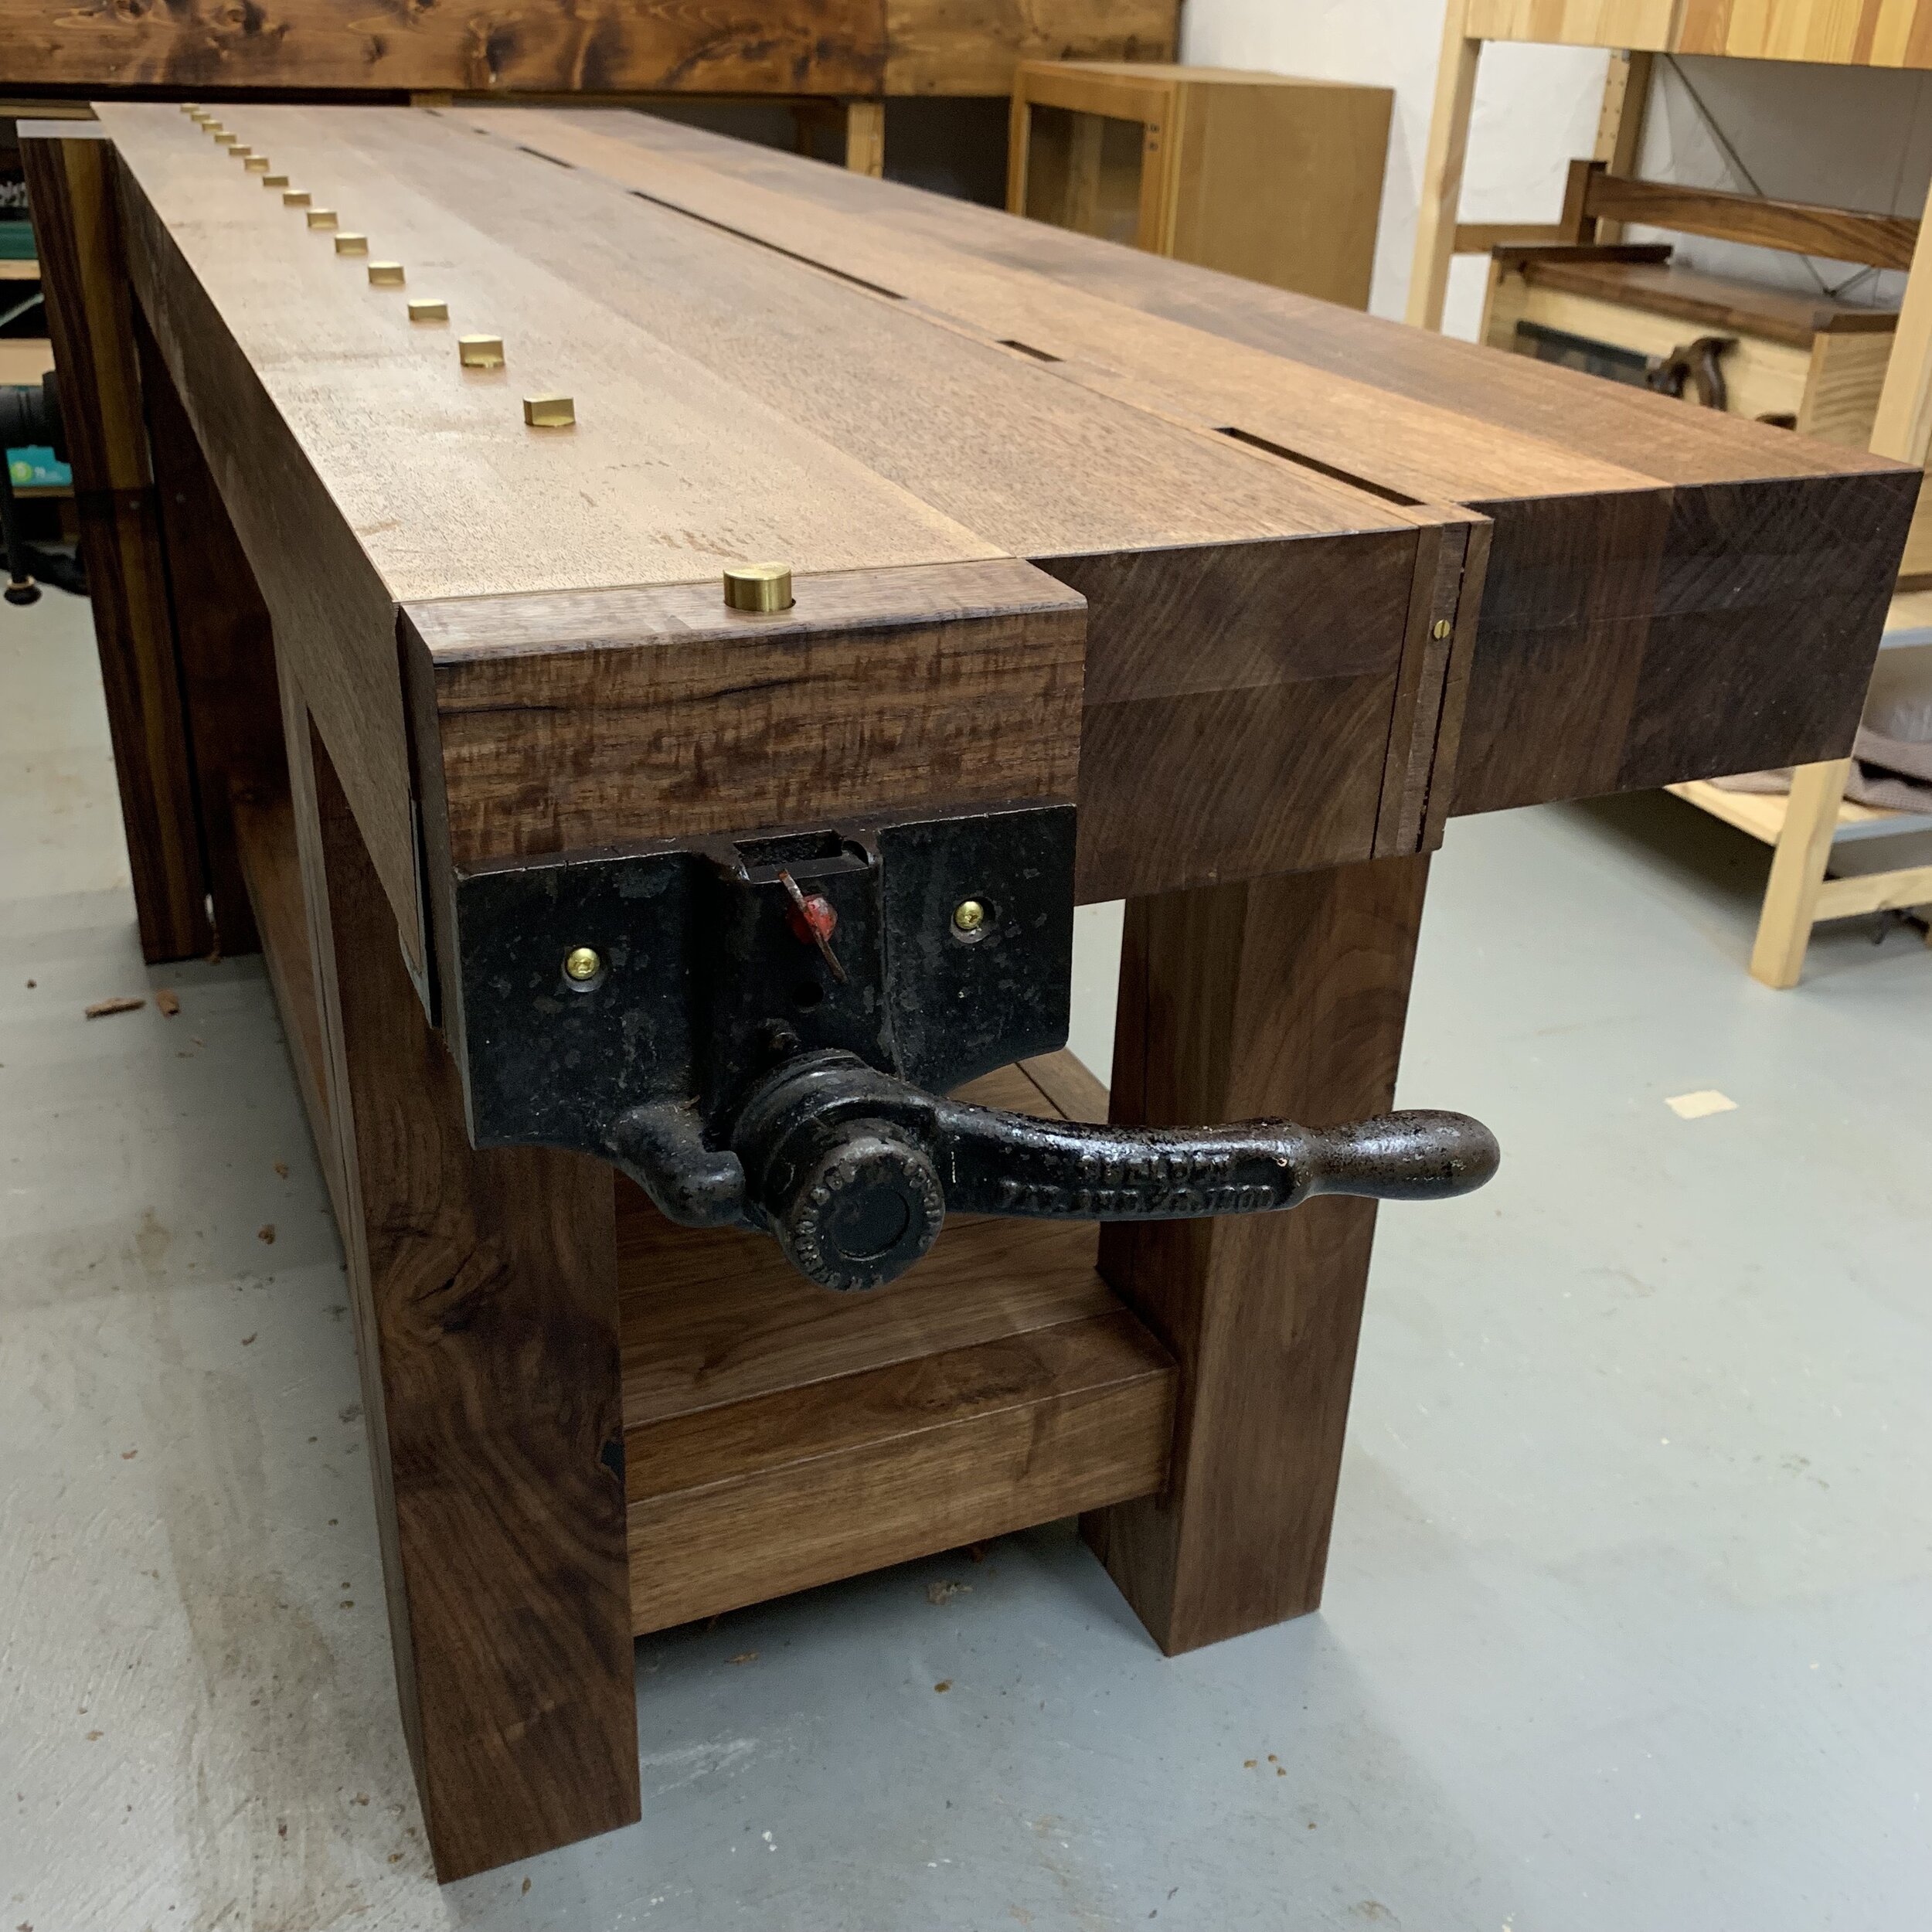
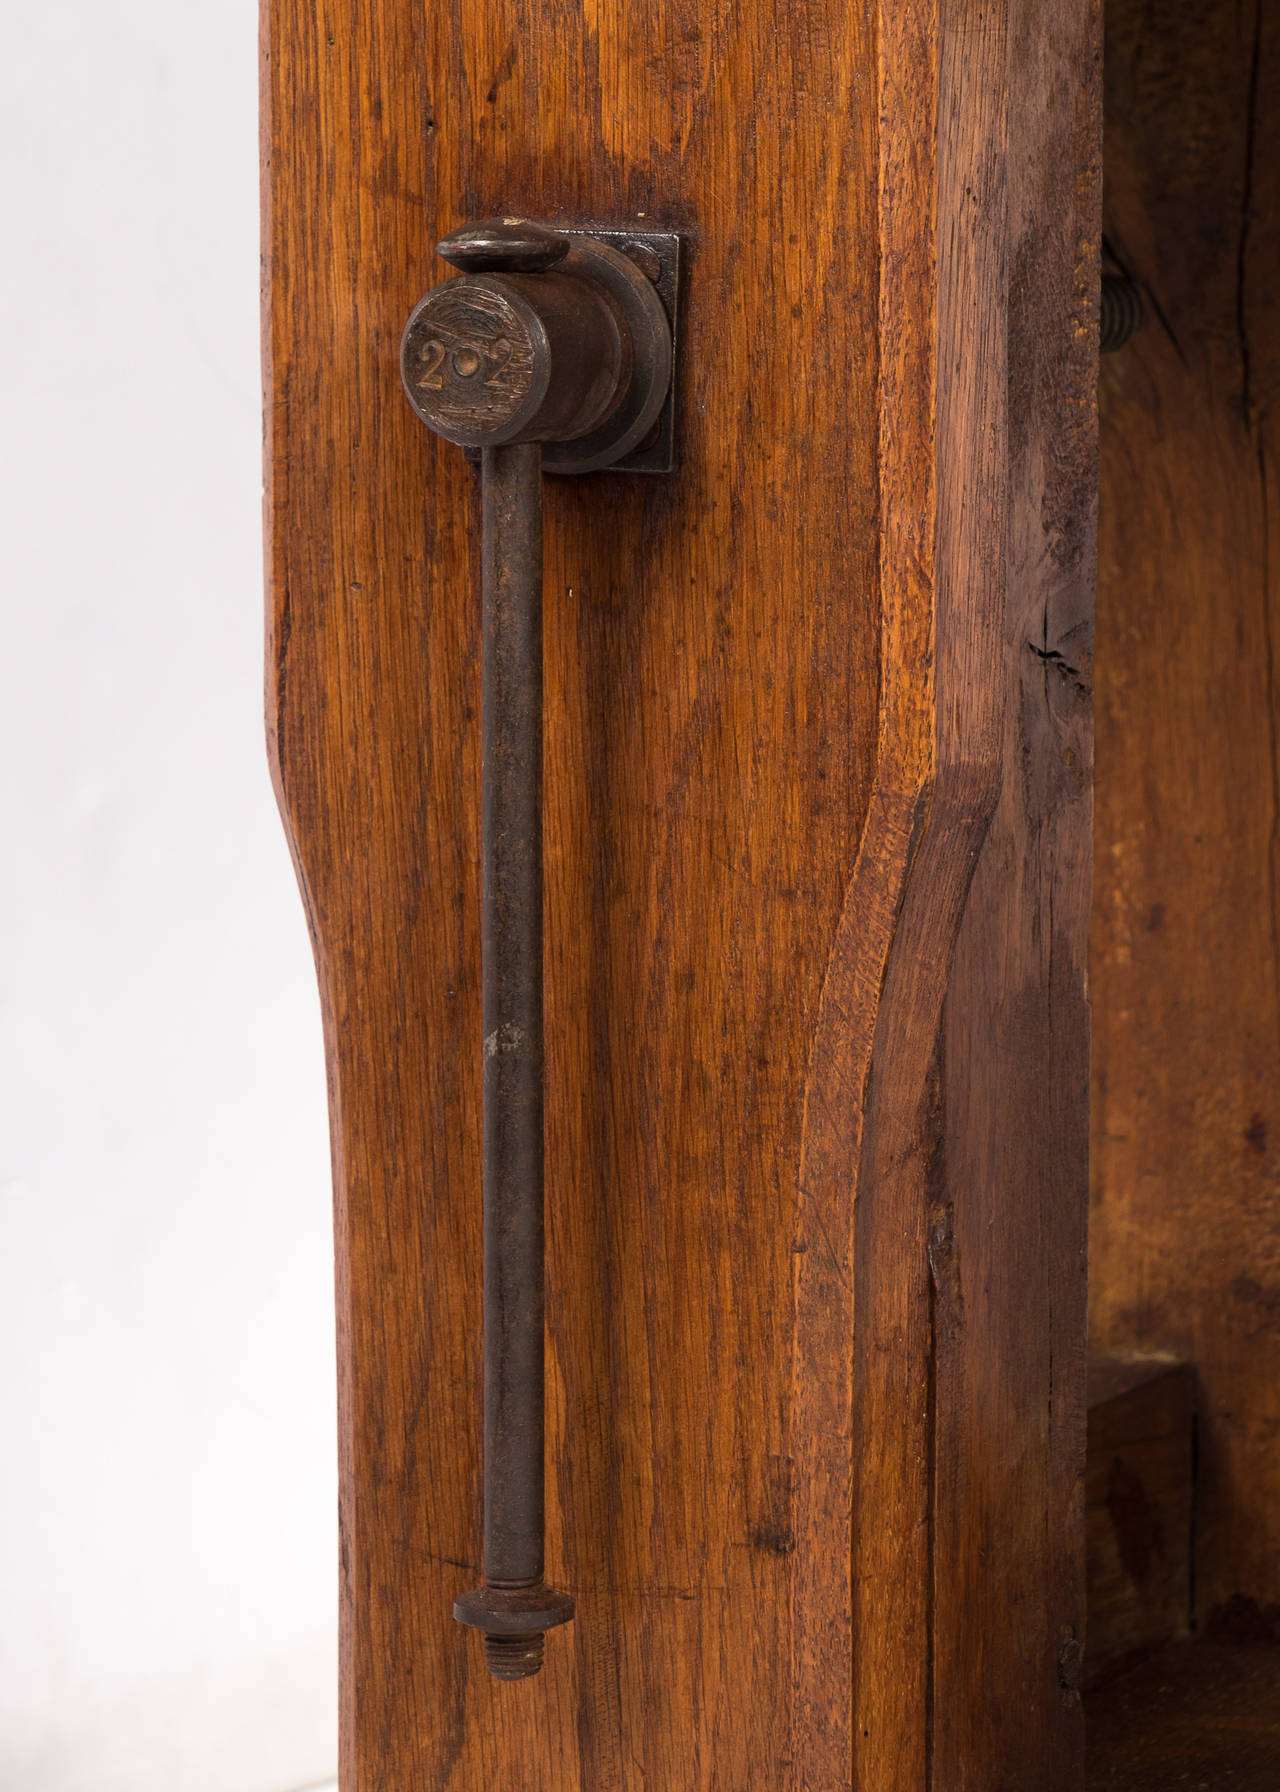
These sheldon vices are pretty nifty, the sliding bolt style action reminds me of a rifle. Though i’ve never touched a gun so I don’t know how accurate that statement is.

Of course it’s not 90 degrees, what fun would it be if it were easy?

Looks about right.

Japanese saws cut like laser razors.

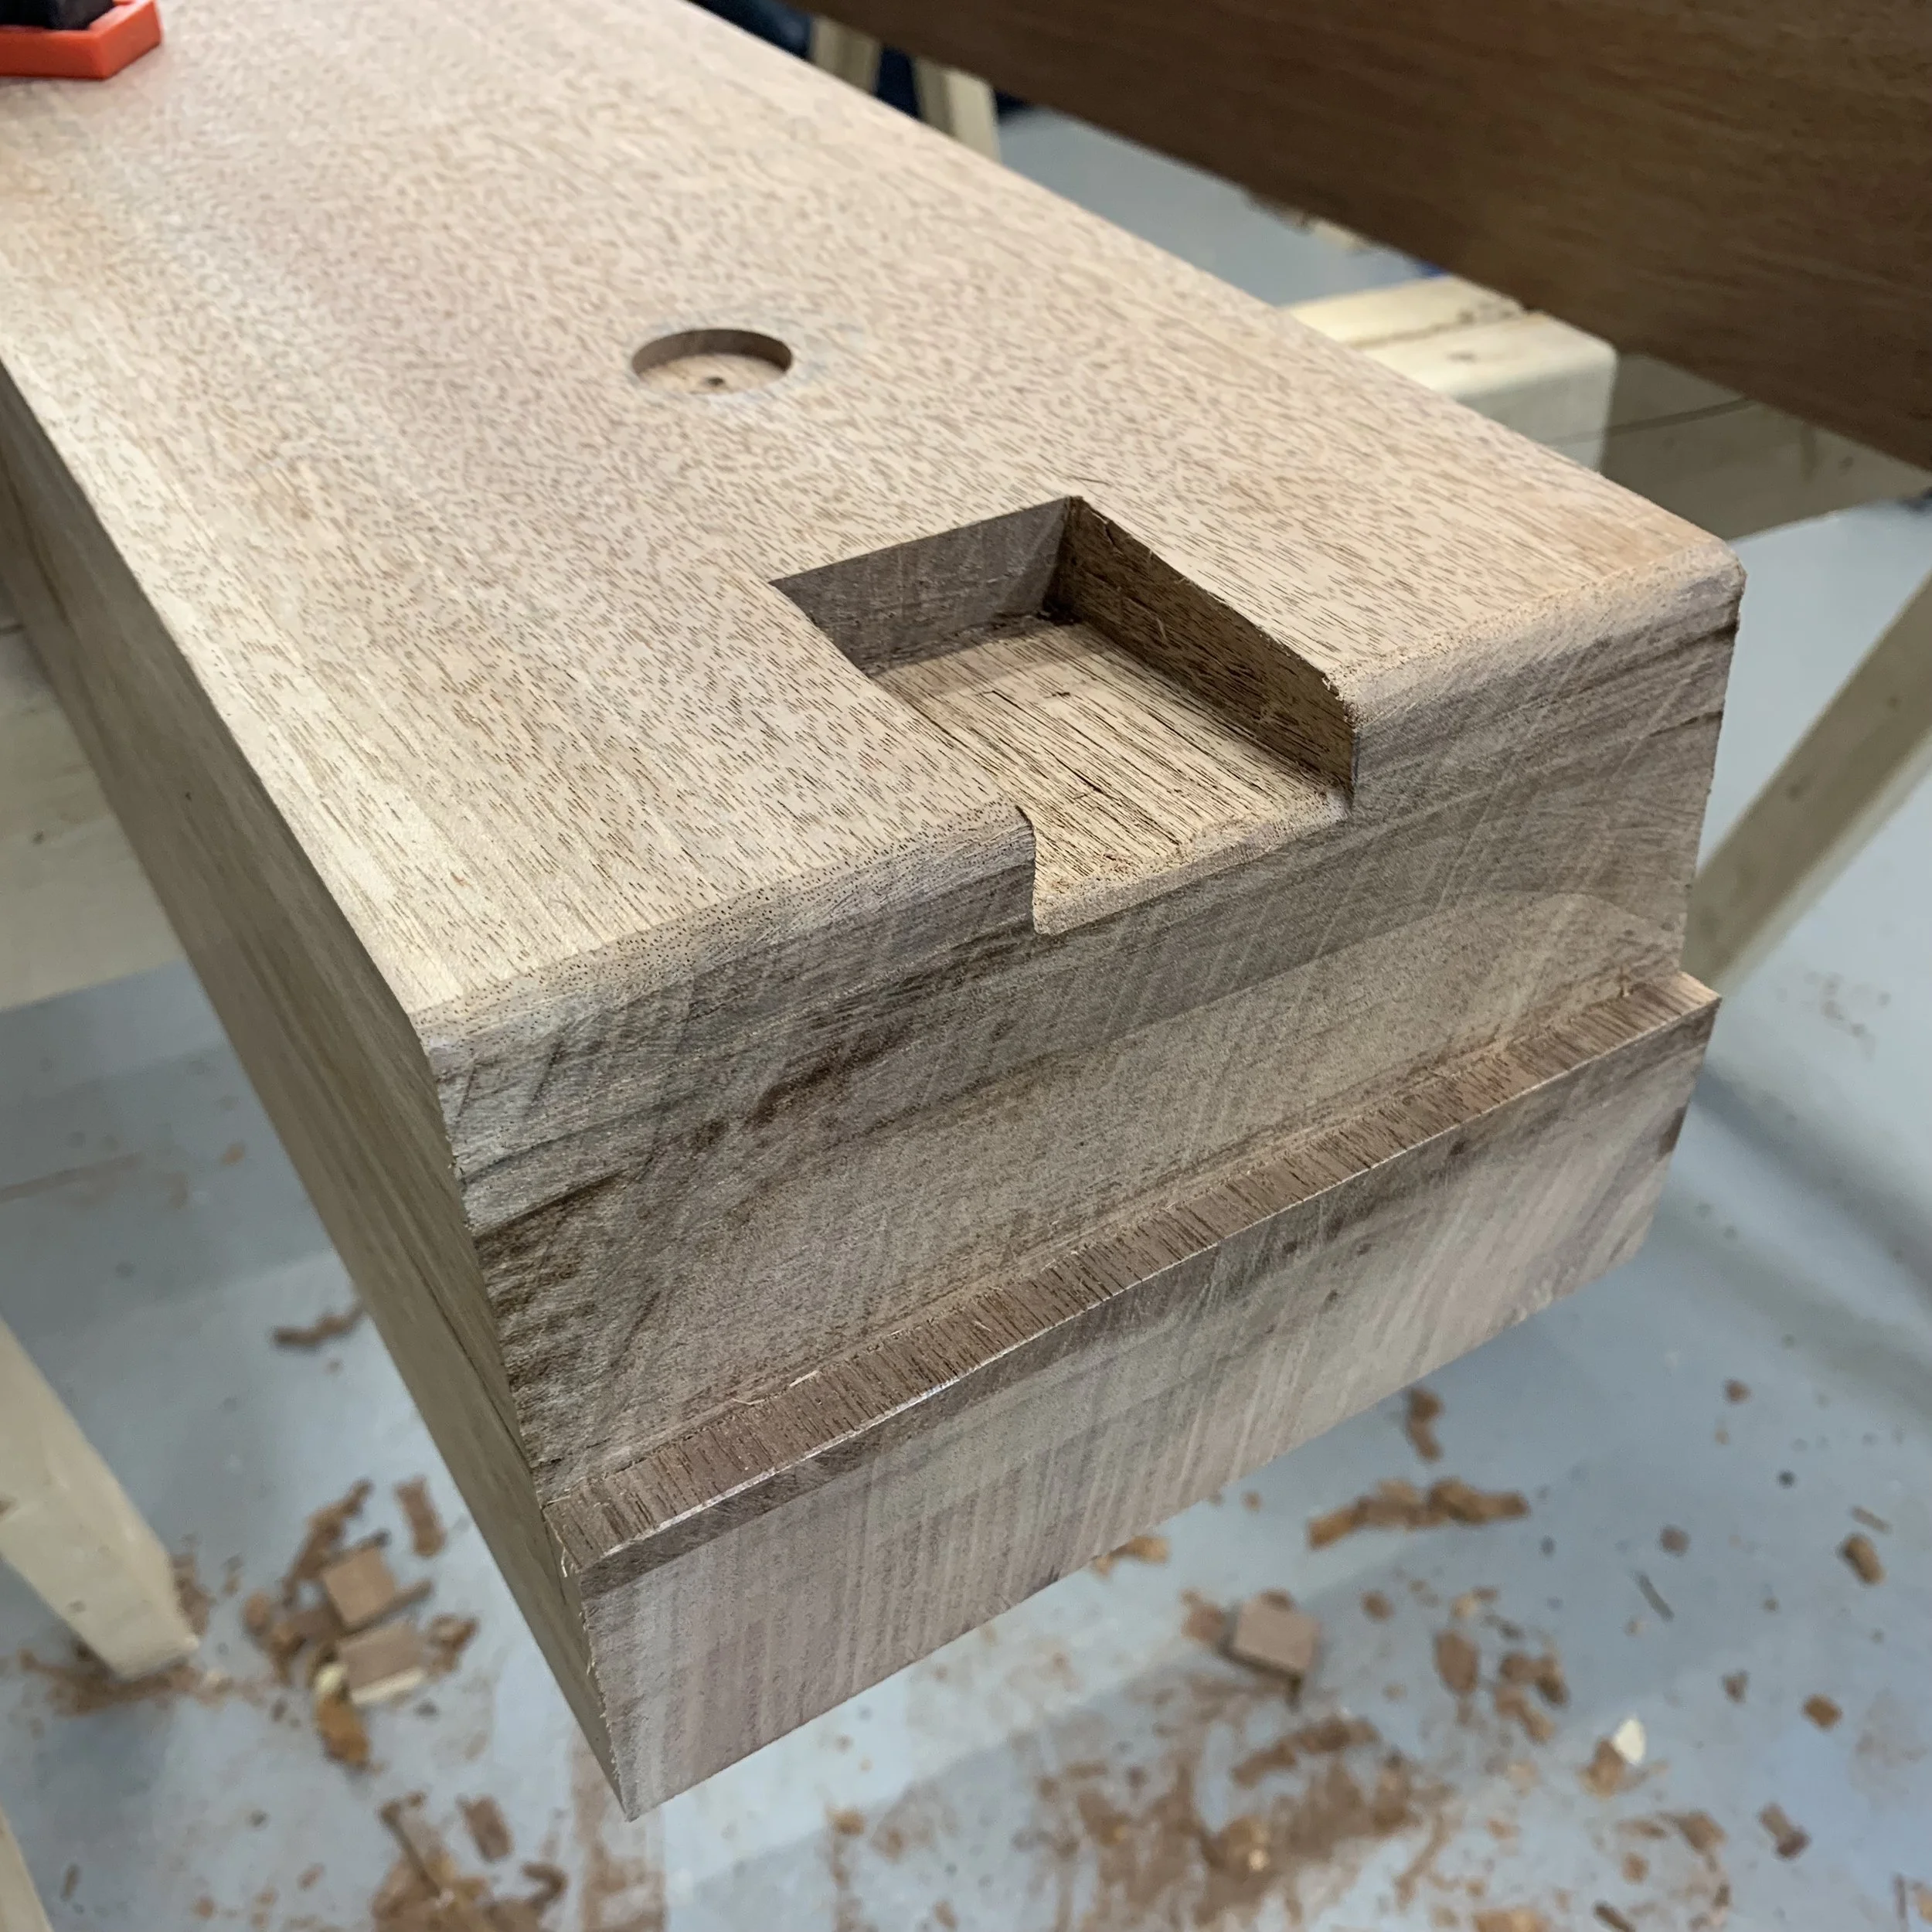
There’s a hump on the bottom which requires a mortise, the hole is for a casting mark.

Skipped a few steps here but I’m sure you get the drift. There was a bit of serendipity here as my widest beam ended up being the exact width of the sheldon vice.

Top front glued and in the clamps. I used titebond 3 if anyone’s wondering.

Back half of the split is about 9”, front is about 13” and the gapstop is about 1.3”.
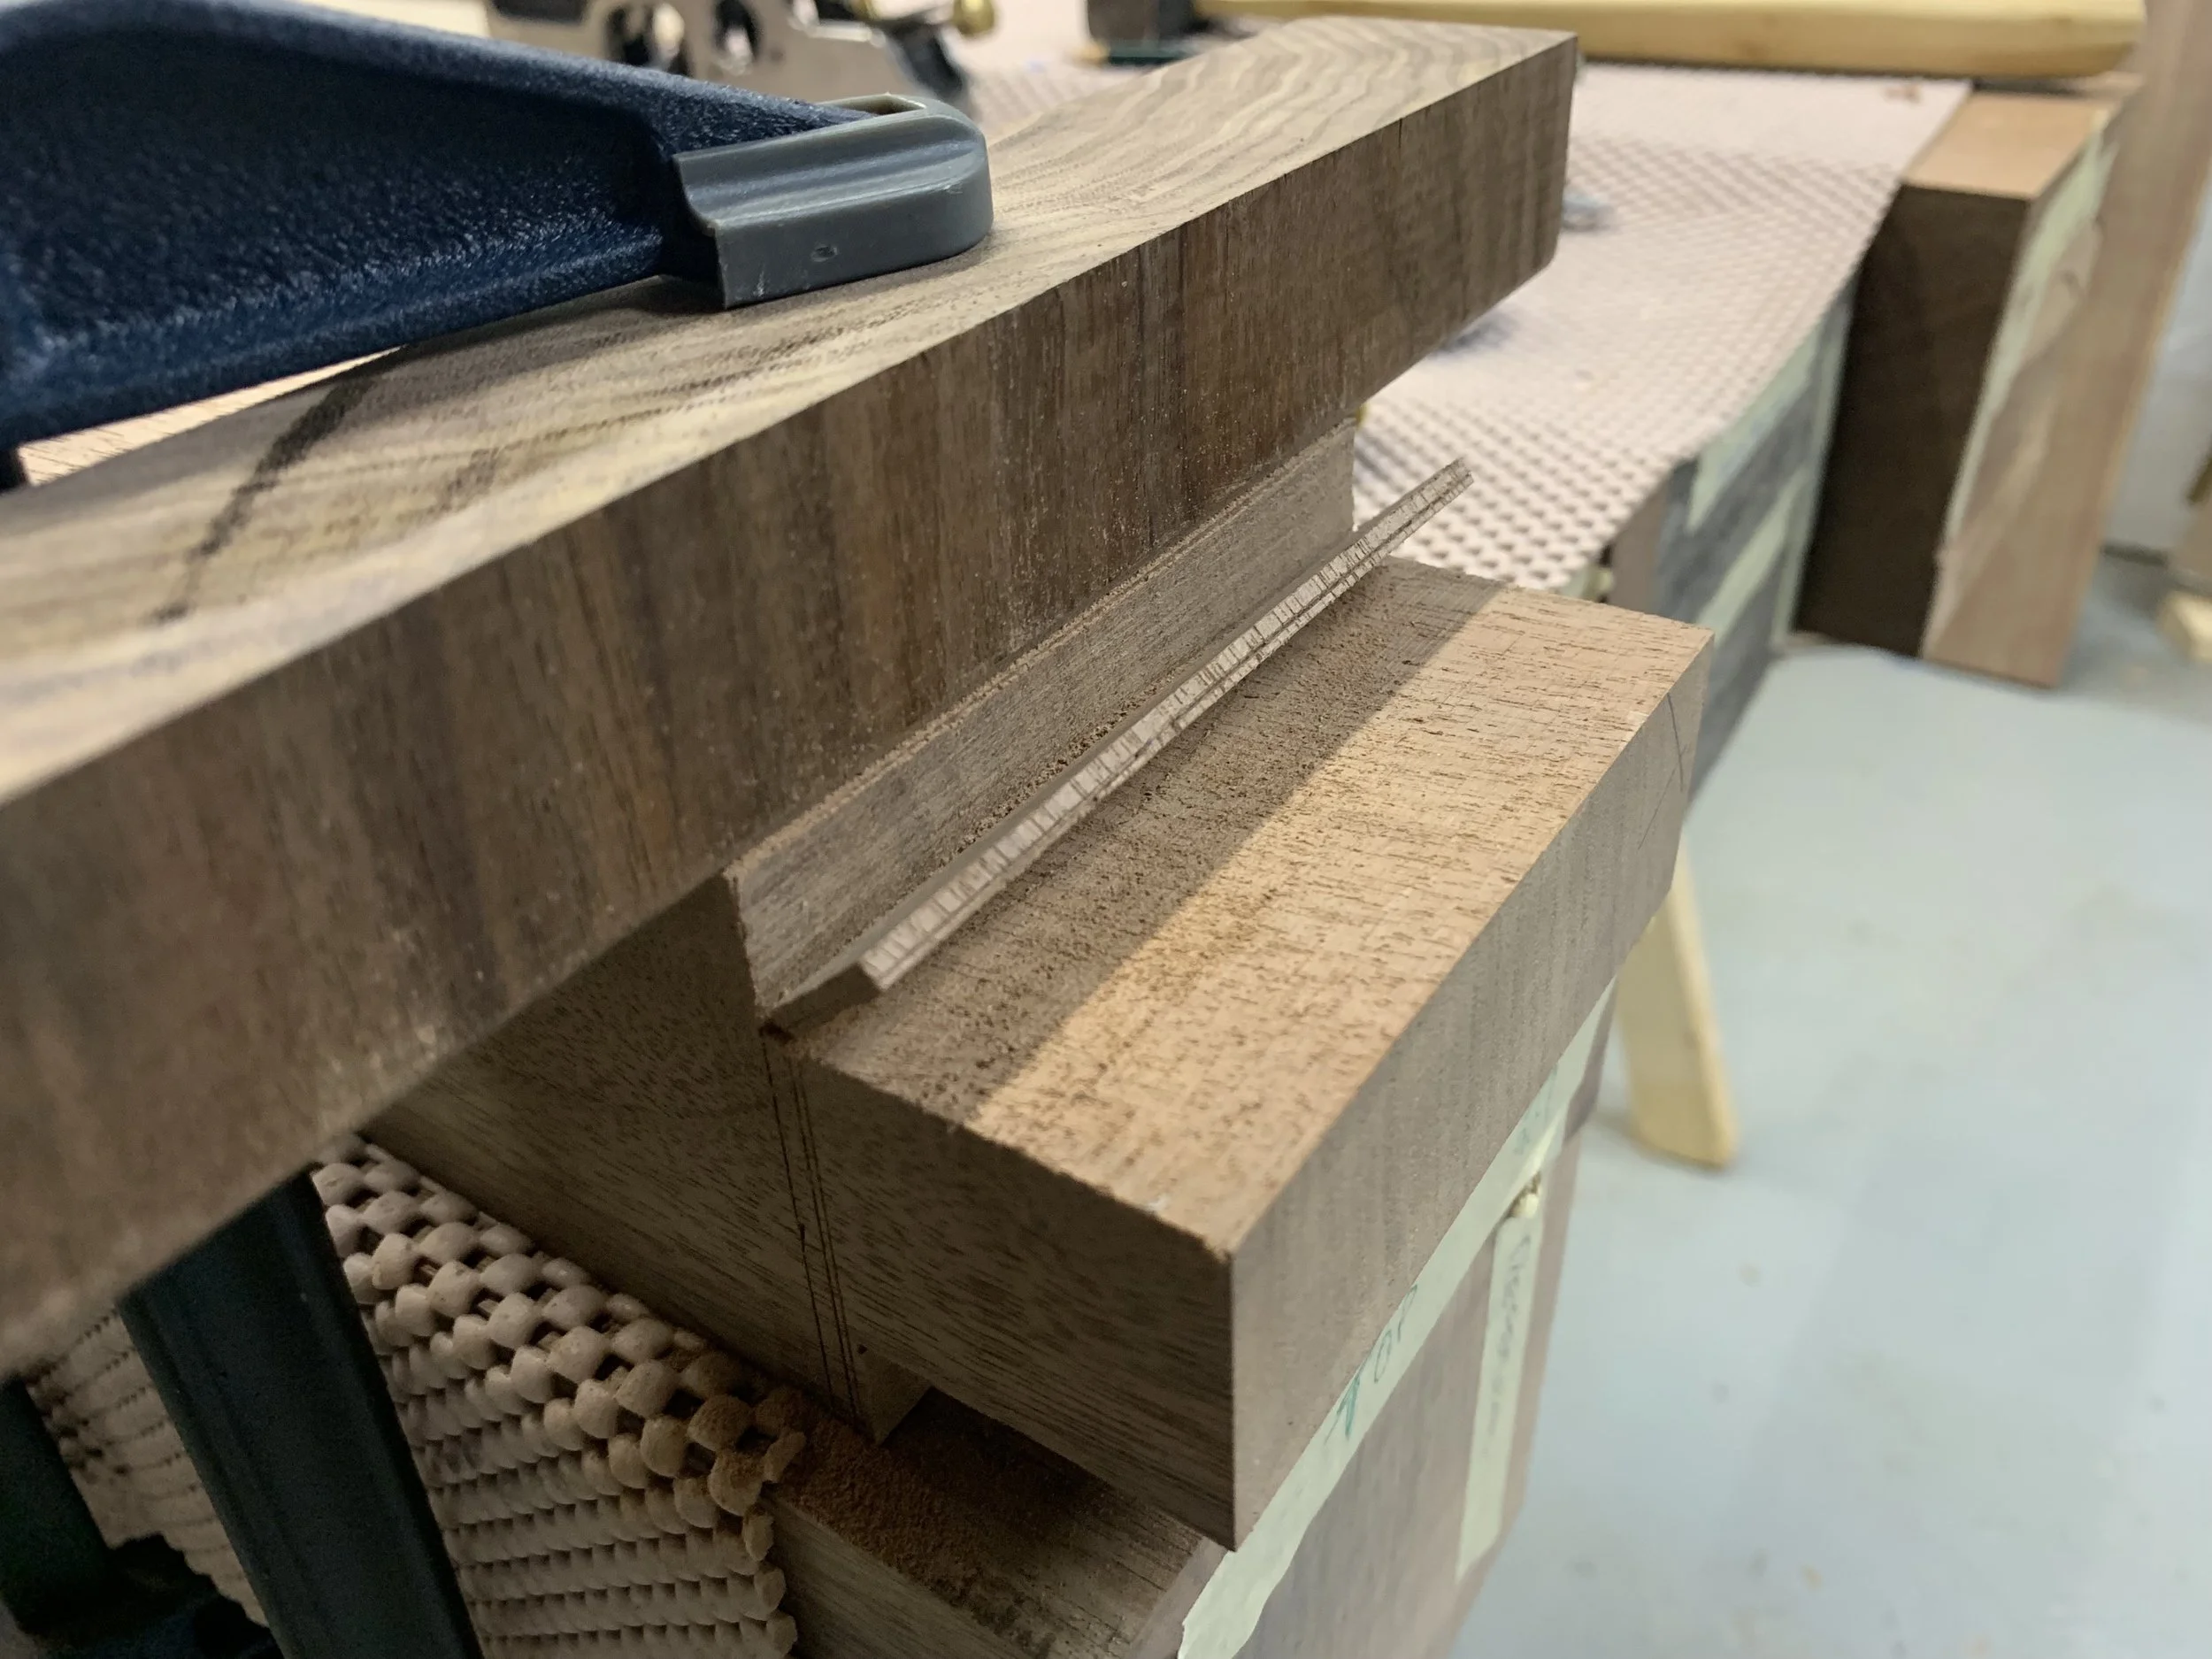
Tenons have been sawn.

And trimmed to fit, sometimes a trimmed a little too close…
The best laid plans often go awry...
Time these days is somewhat of a precious commodity and time spent in the workshop even more so. What time I do have I tend to plan out in meticulous detail, usually while my wife is asking me to do something. As much as I expect things to go smoothly, entropy often extends its leg to trip me up. It’s the way of the universe after all. The issue here was with my dust collector. I had neglected to install a baffle plate (long story), which led to chips collecting in the filter and the fine dust canister. It announced it had enough with a loud pop and the entire filter dropped down. The pictures tell a better story than I can…

Humm, that’s not good.

Bags full too….

Ummmm, that’s not supposed to be there…
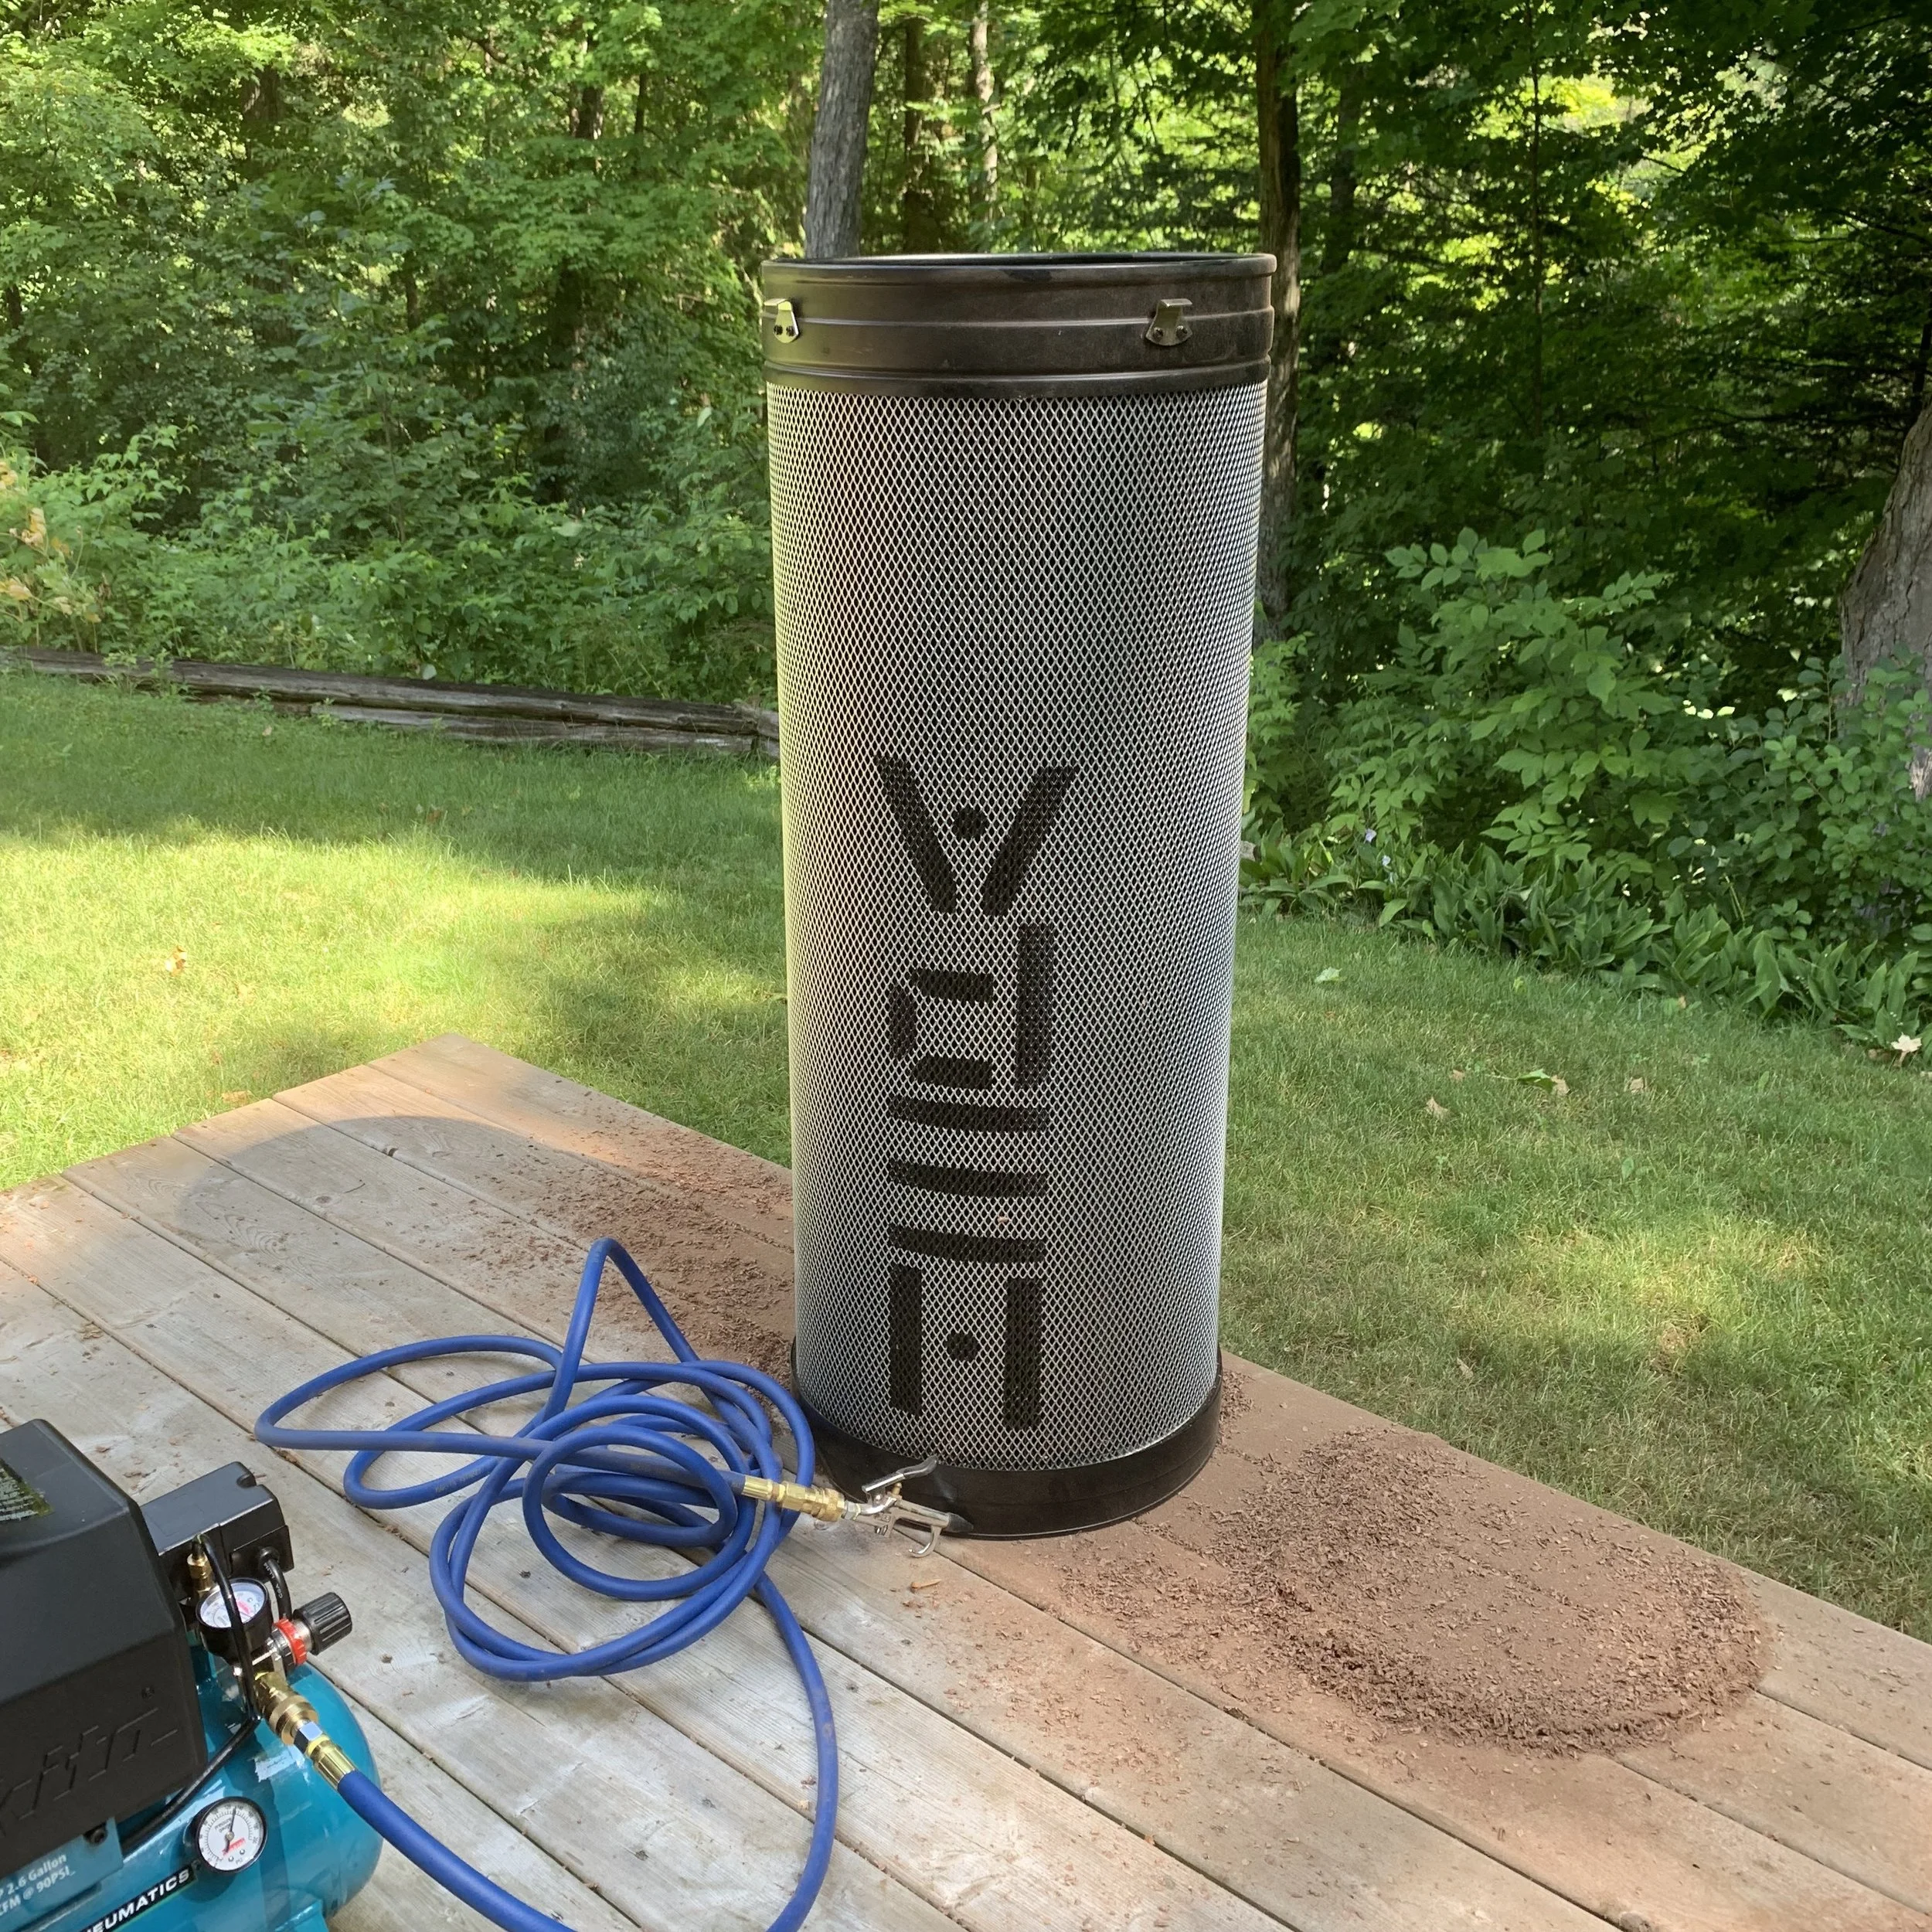
Pretty sure I lost my hepa rating.
Capital Improvements
Your eyes have a remarkable ability to adapt to low light, to a point where your shop might not feel dark but it actually is. At least for woodworking purposes… I had two LED bulbs illuminating my space and they just weren’t enough. Chopping mortises was particularly difficult as I’d just revert to blindly stabbing the mortise floor hoping errant pieces of wood were lurking in the shadows. Enough. Enter hyperikon led lights. Simple to install and enough lumens to give me a nice tan.

Note the auxiliary ikea lamp hanging off the right wall.

I can’t believe how simple and cheap LED technology is these days.

Just kidding about the tan. 4000K bathes you in a off-whiteness as not to be too sterile but white enough to mess up your instagram pictures.
A Leg To Stand One
After months of planning, reading and designing in sketch-up, it was time to install the benchcrafted leg vice. It took a long time to get comfortable with the order of operations, I think I scoured just about every build on the internet to glean as much as I could about the process. It’s not that the benchcrafted instructions are bad… it’s just a visual guide would go a long way to making things click (fortunately there a few really great youtube videos floating around out there). Also, depending on the tools you have on hand you may want to switch up the process a little. So, if you’re planning your own build, keep reading and feel free to ask any questions below.
Using blue tape to mark out knife lines makes me feel less like a wood butcher and more like a wood surgeon.

Most of the waste was hogged out with a forstner bit. Make sure your drill press table is square before you get started…
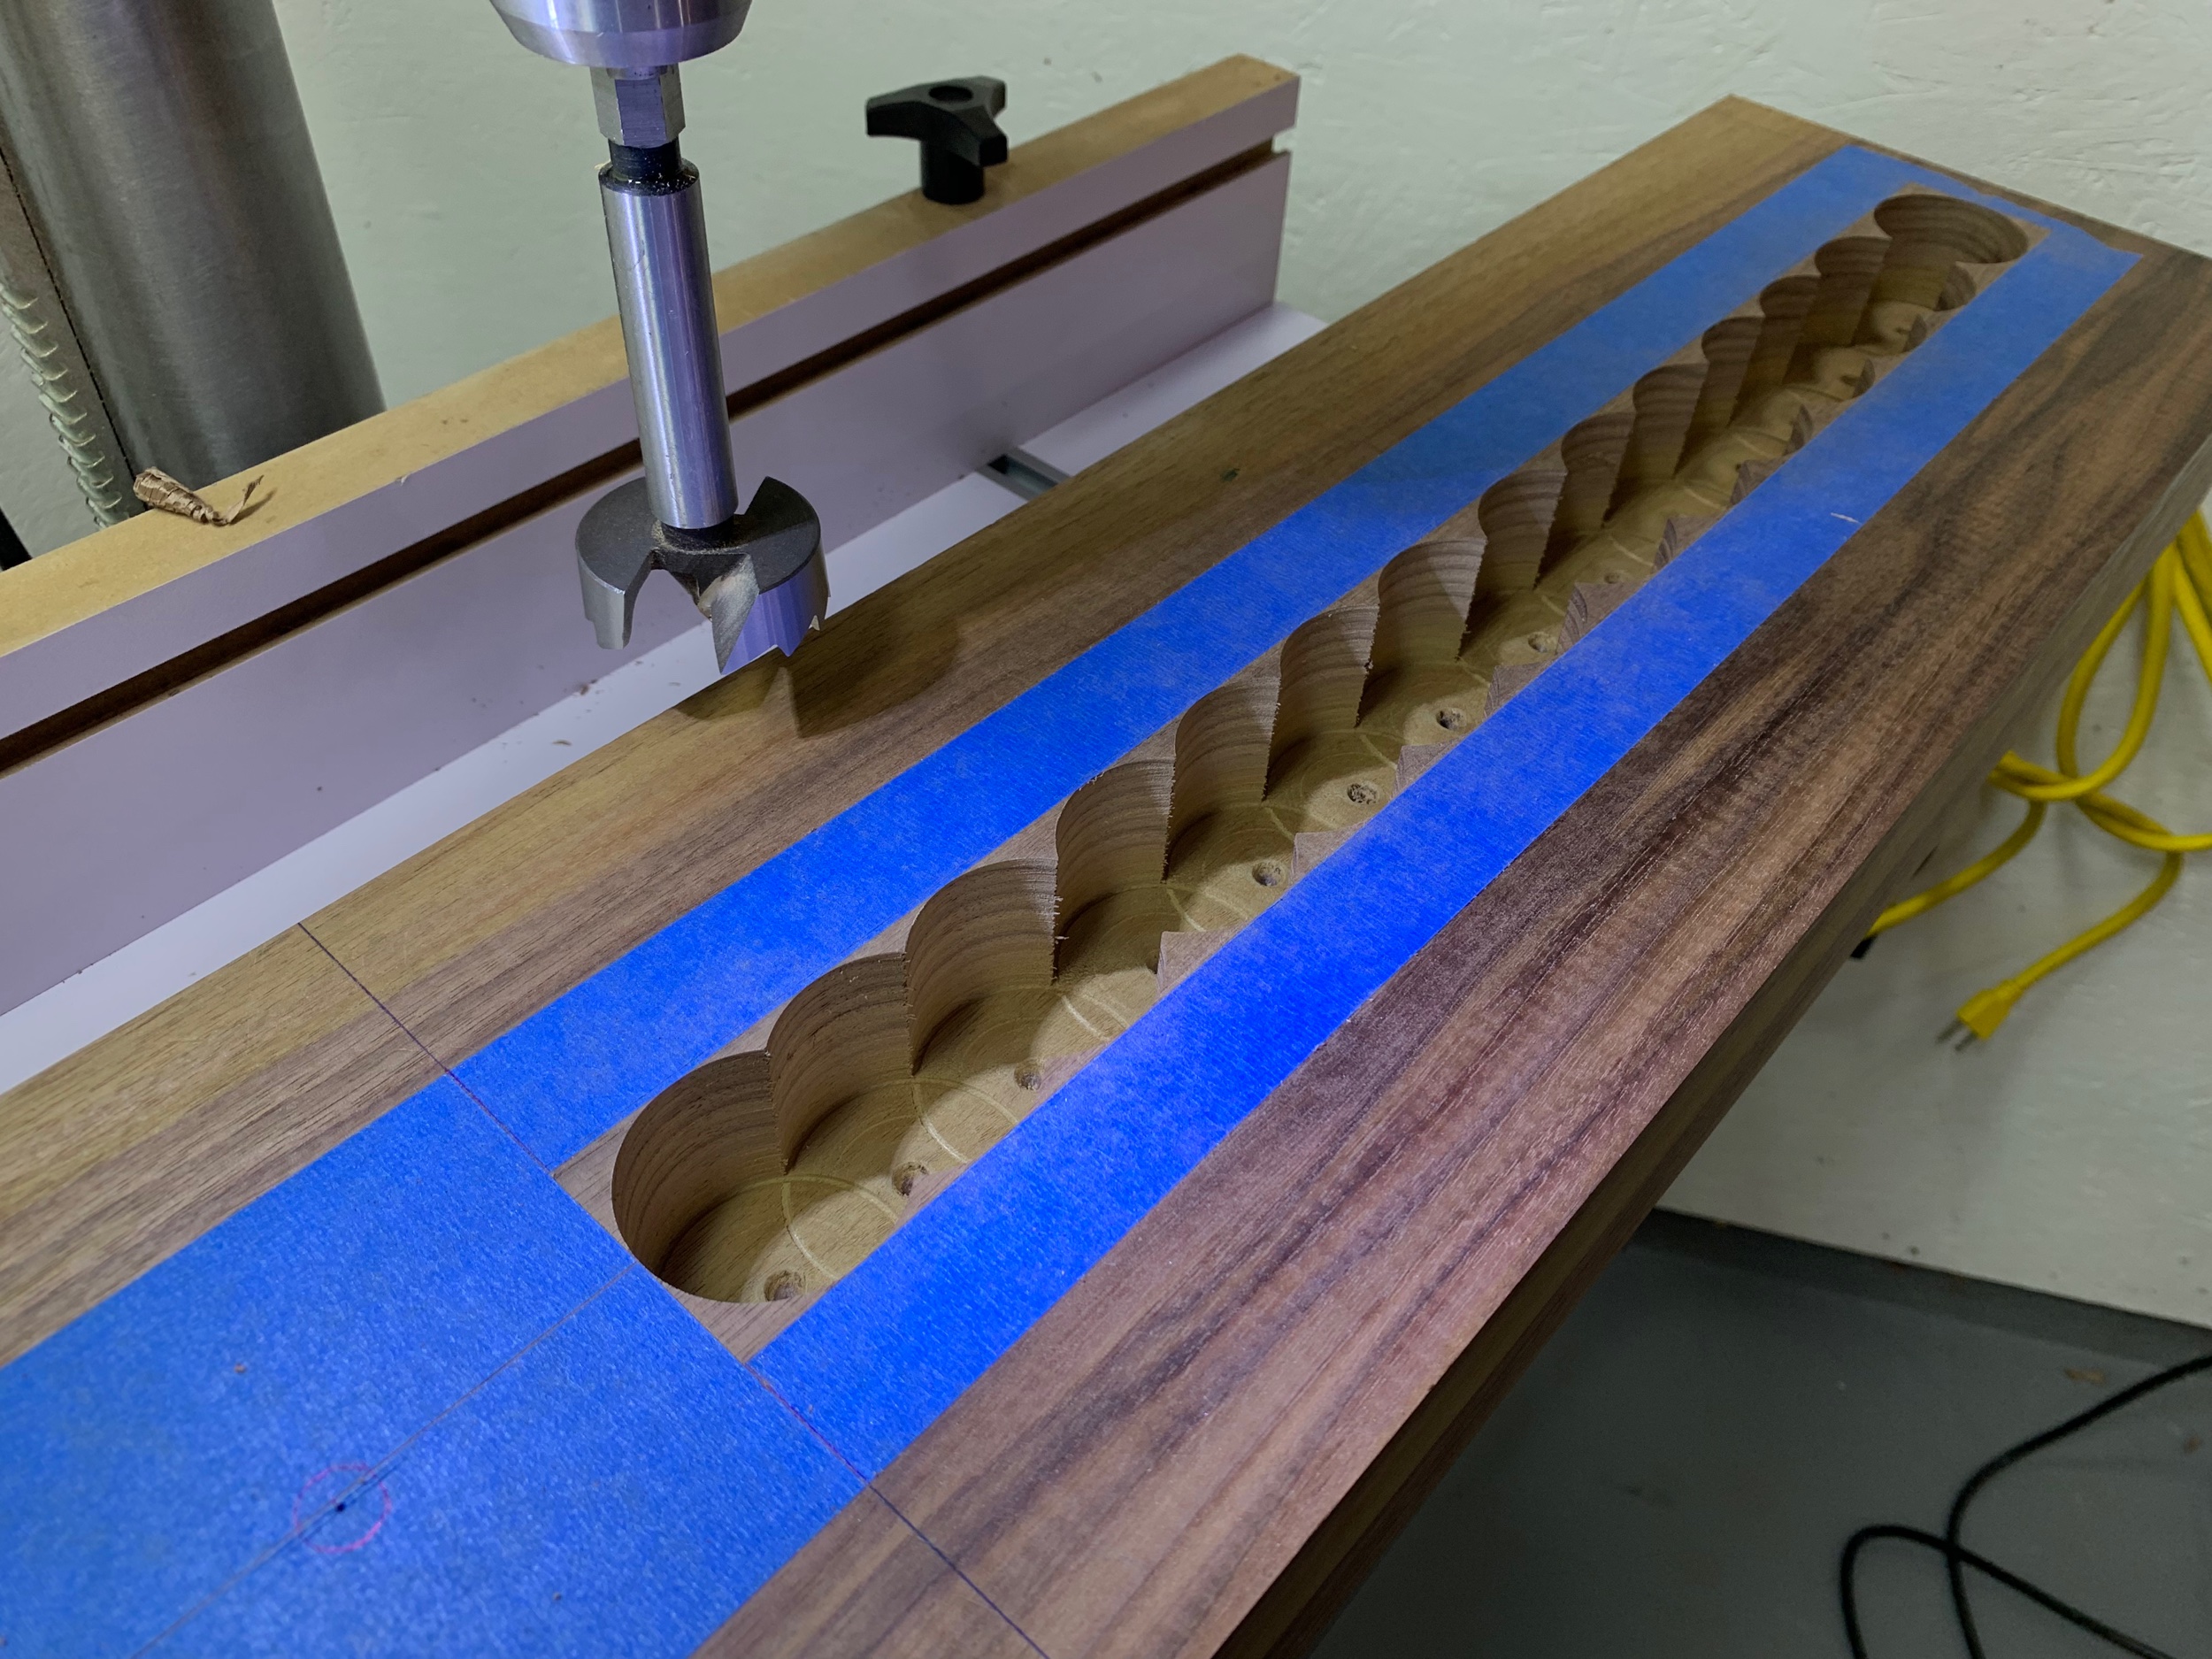

I cut the pocket for the acetal bushing with a large forstner and then used a smaller forstner to drill the hole for the vise screw. This was a multistage process. My drill press quill didn’t have enough travel to make it all the way through, so I had to start the hole stop and then raise the table and start again. All in all it worked great.

Used a similar start stop process when making the holes for the steel rods. This extra long fisch 3/8” brad point bit will probably be a one use purchase but it was worth it.

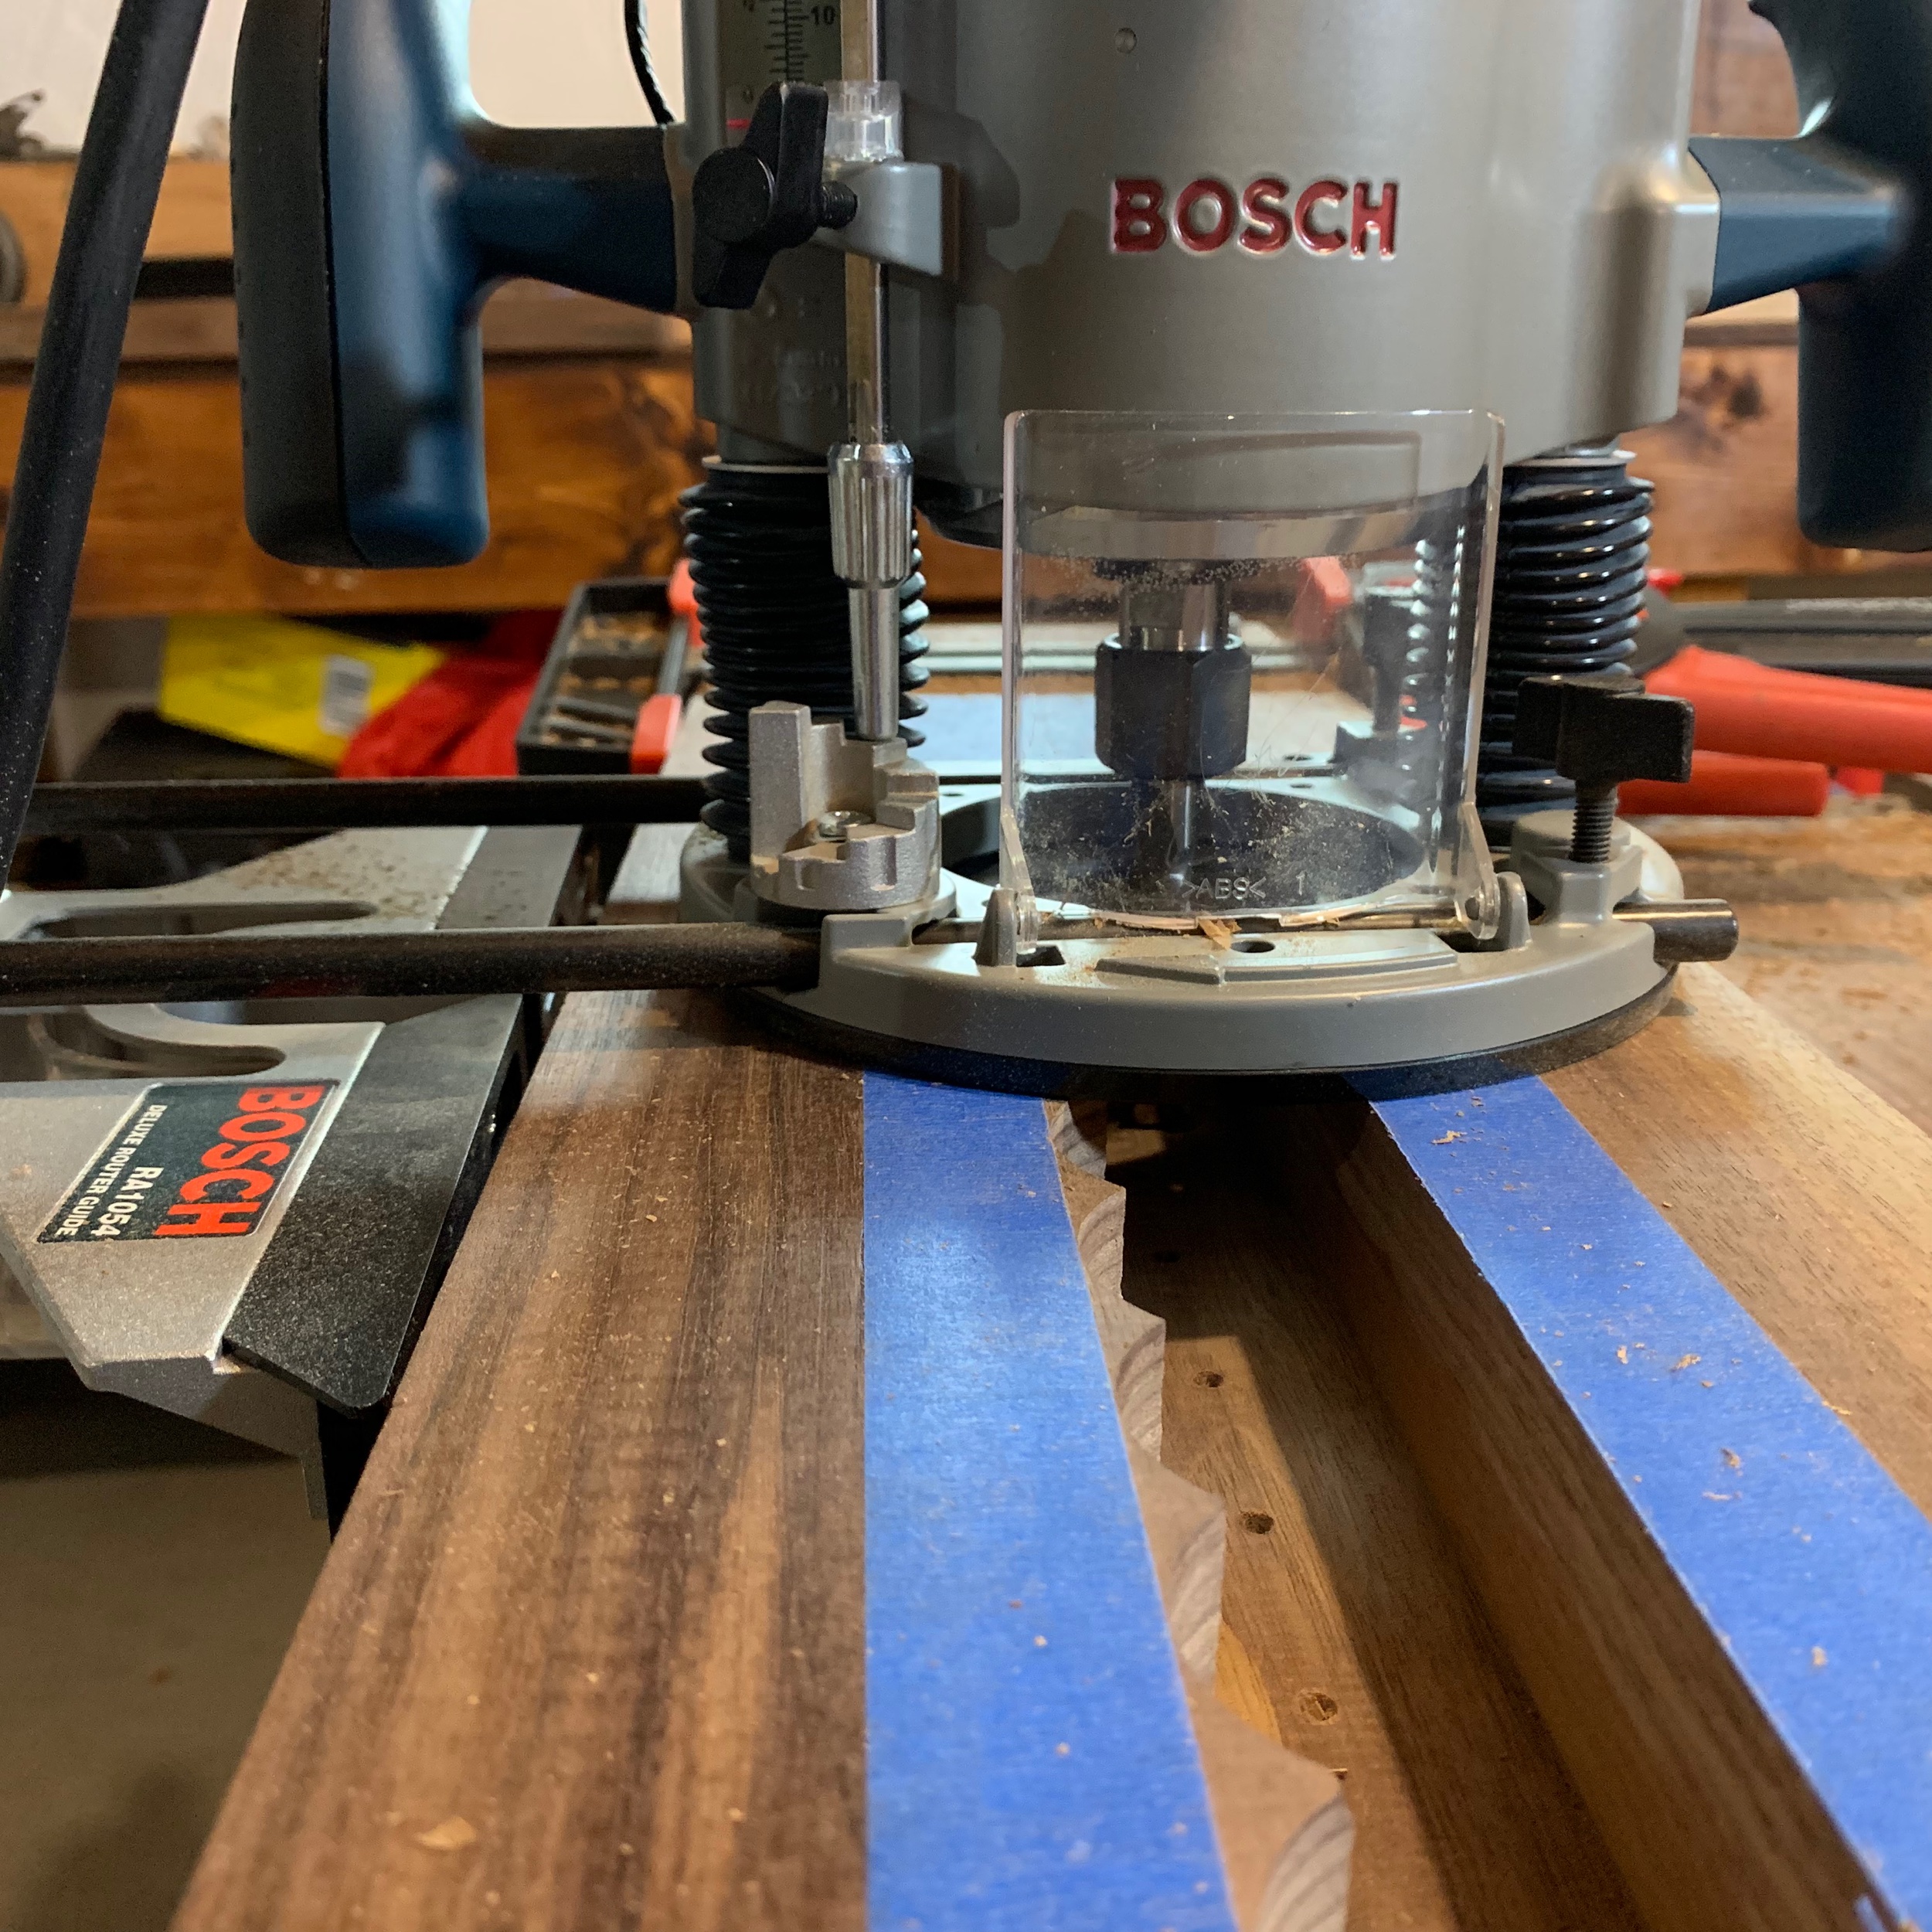
I don’t like routers, probably because I don’t really know how to use them. I watched a few youtube videos and bungled my way through cleaning up the mortises. In retrospect my cut direction was wrong… Goddam 10 minute youtube videos saving the important stuff for last, my attention span isn’t long enough for that shit.

X marks the spot.

And here she is, just a little fettling to go but all the major work is done.
Forgive me Roubo for I have sinned
I’ve brought epoxy into your house…. but it was a necessary indiscretion. The checking was too severe and the legs needed to be stabilized.
Resin is a funny business, I was a little hesitant to get started due to the chemistry involved but all in all it was a fairly straightforward, yet messy, process.


After a few days of letting the resin cure, I thought all was well and I was in the clear. That was until I checked the legs for square. It turns out dumping a pint of resin into a rift does funny things and is capable of turning what was a square leg into a rhombus. Oh well, thankfully I still have enough thickness on the depth to re-mill things square.

To The Top
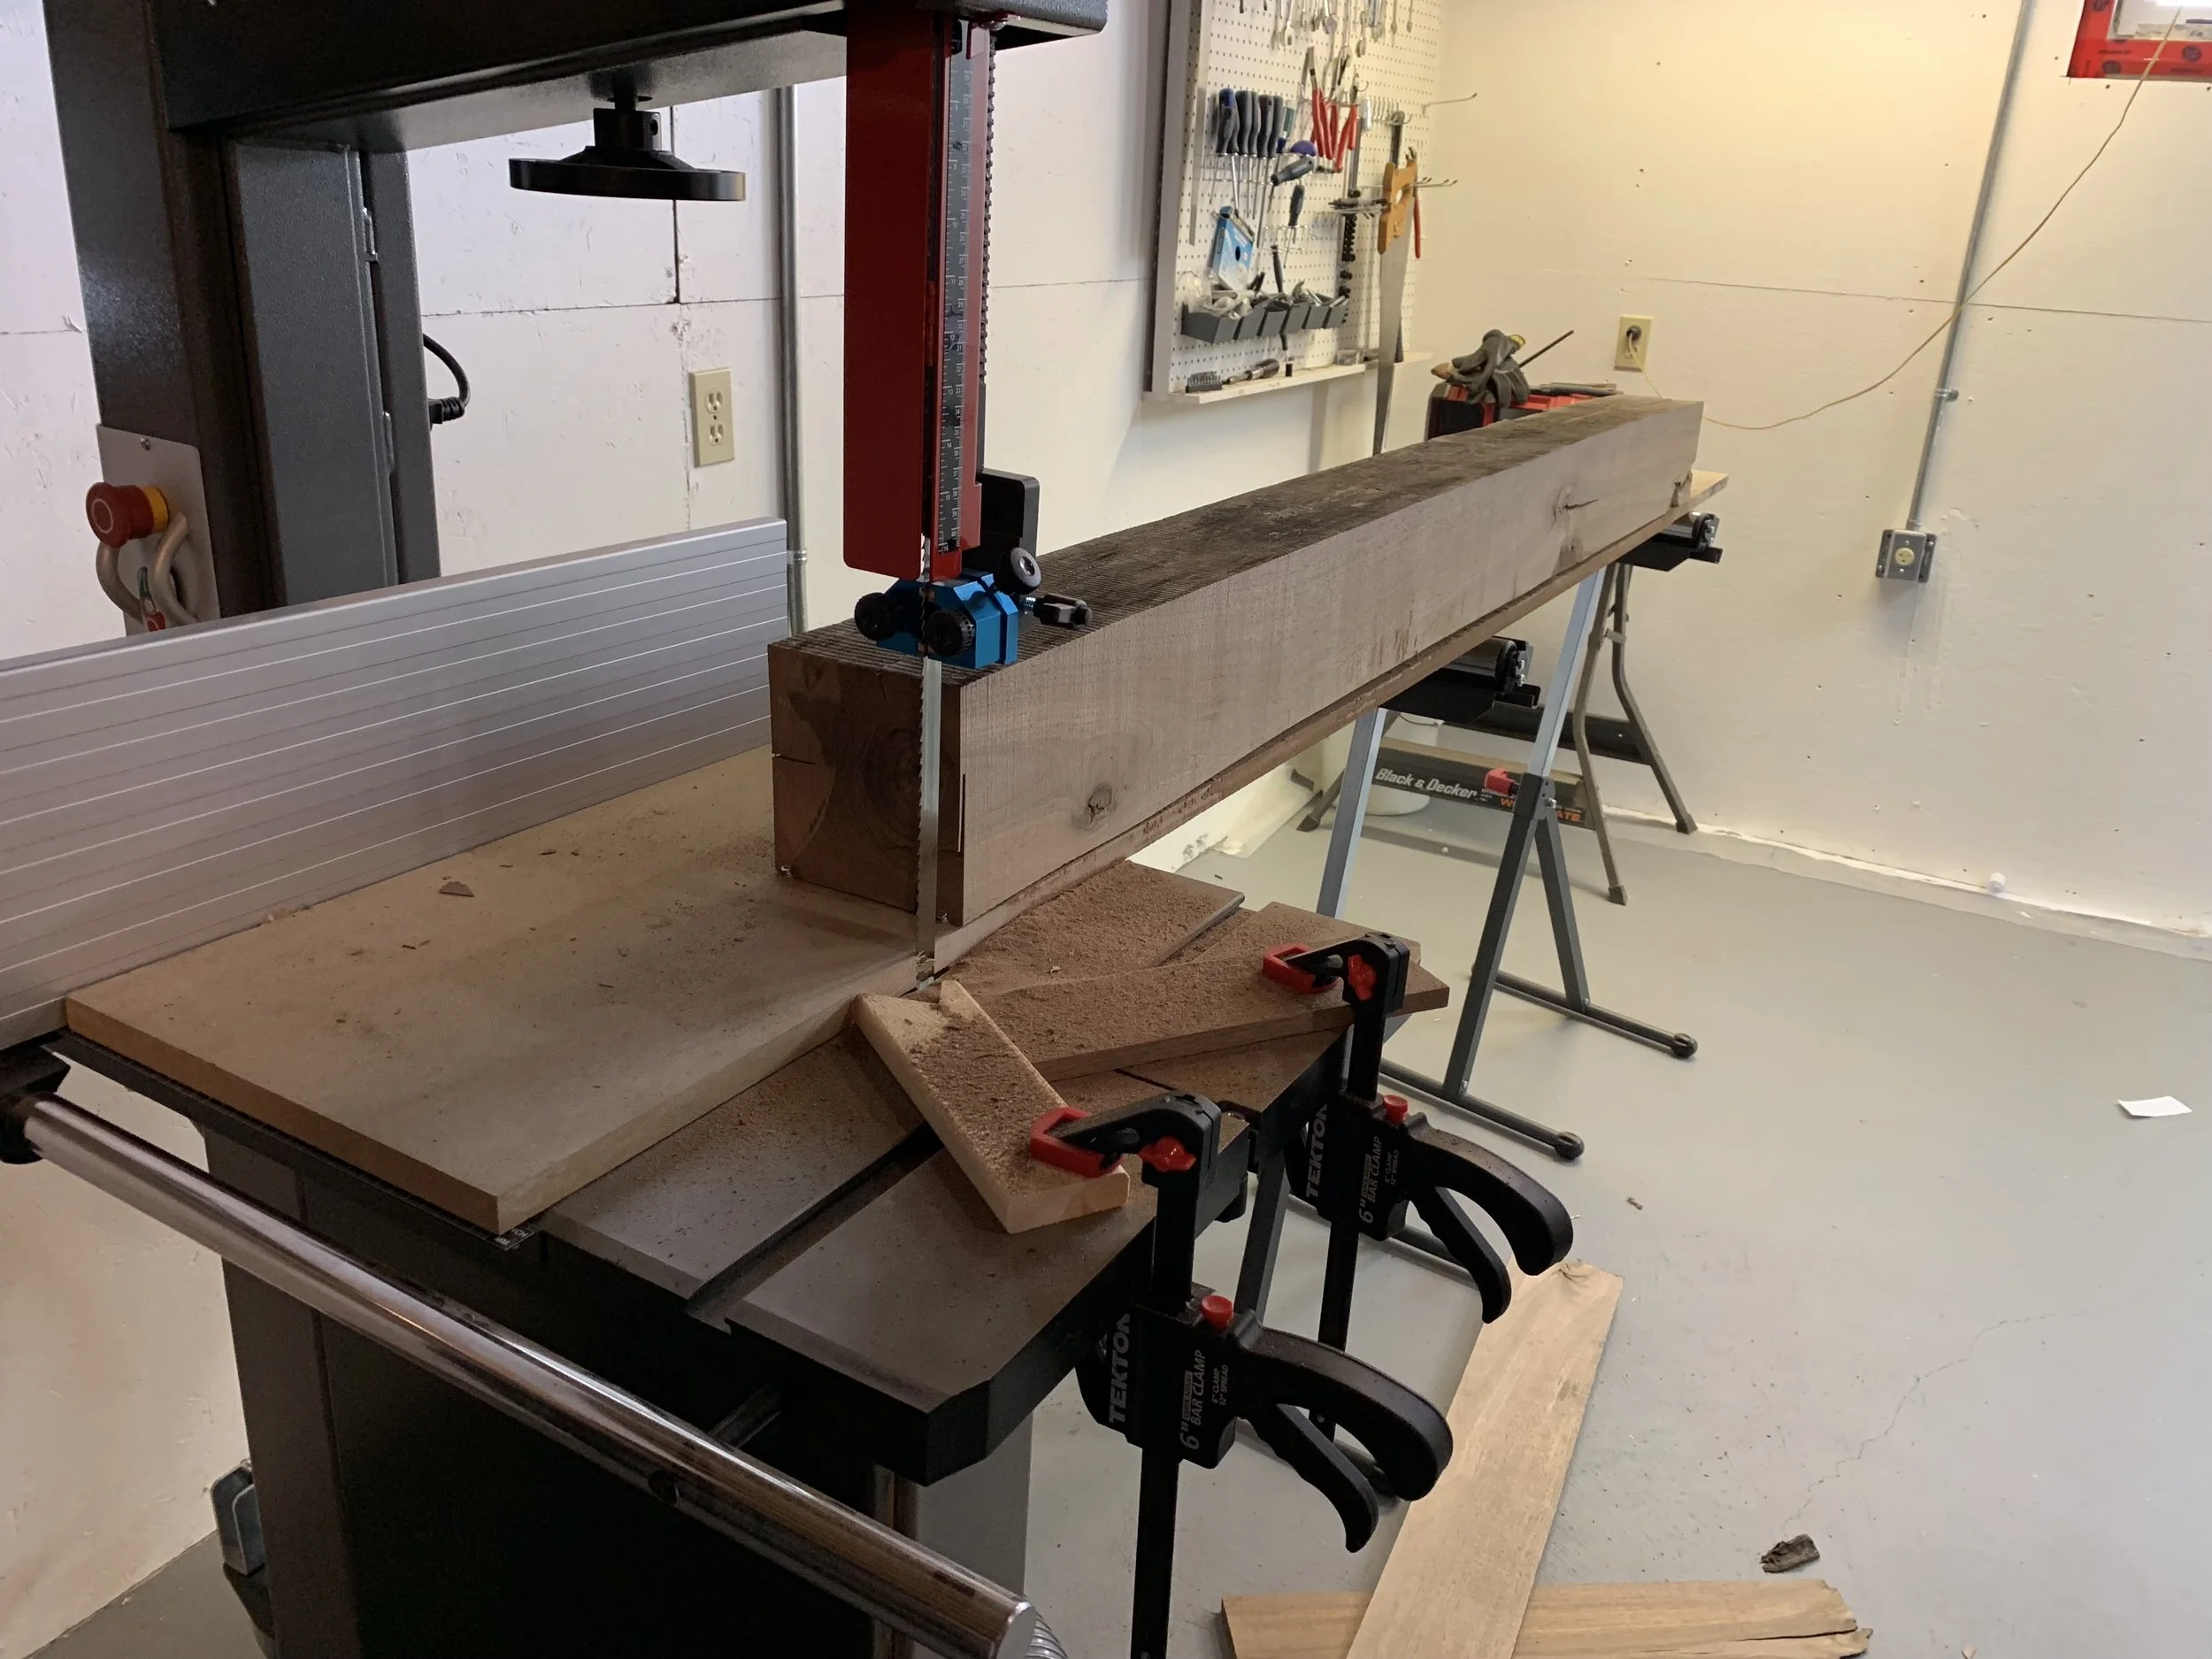
Today was a tough day, tackling the roubo top beams proved challenging. I tried to rip a square edge on the bandsaw using a MDF sled but I found the blade to drift and bow out. Perhaps I have a tension issue… Jointing was also challenging and I had to use a few shortcuts to joint one reference side flat. The biggest problem was with the planer. One of the beams was tapered and became wedged. The table was at its lowest setting so there wan’t anywhere else for it to go. A major fuckup. I had to disconnect the gears from the shafts and have my father in-law slam the beam backwards to unjam it. Not a pretty procedure but the patient was saved.


My 8” wedgebed looks dinky when up against these 6x8 monsters

Removing the chain tensioner and the gears allowed the beam to be worked out backwards.

Getting closer, I can probably glue up one half of the top now.
How to eat an Elephant?
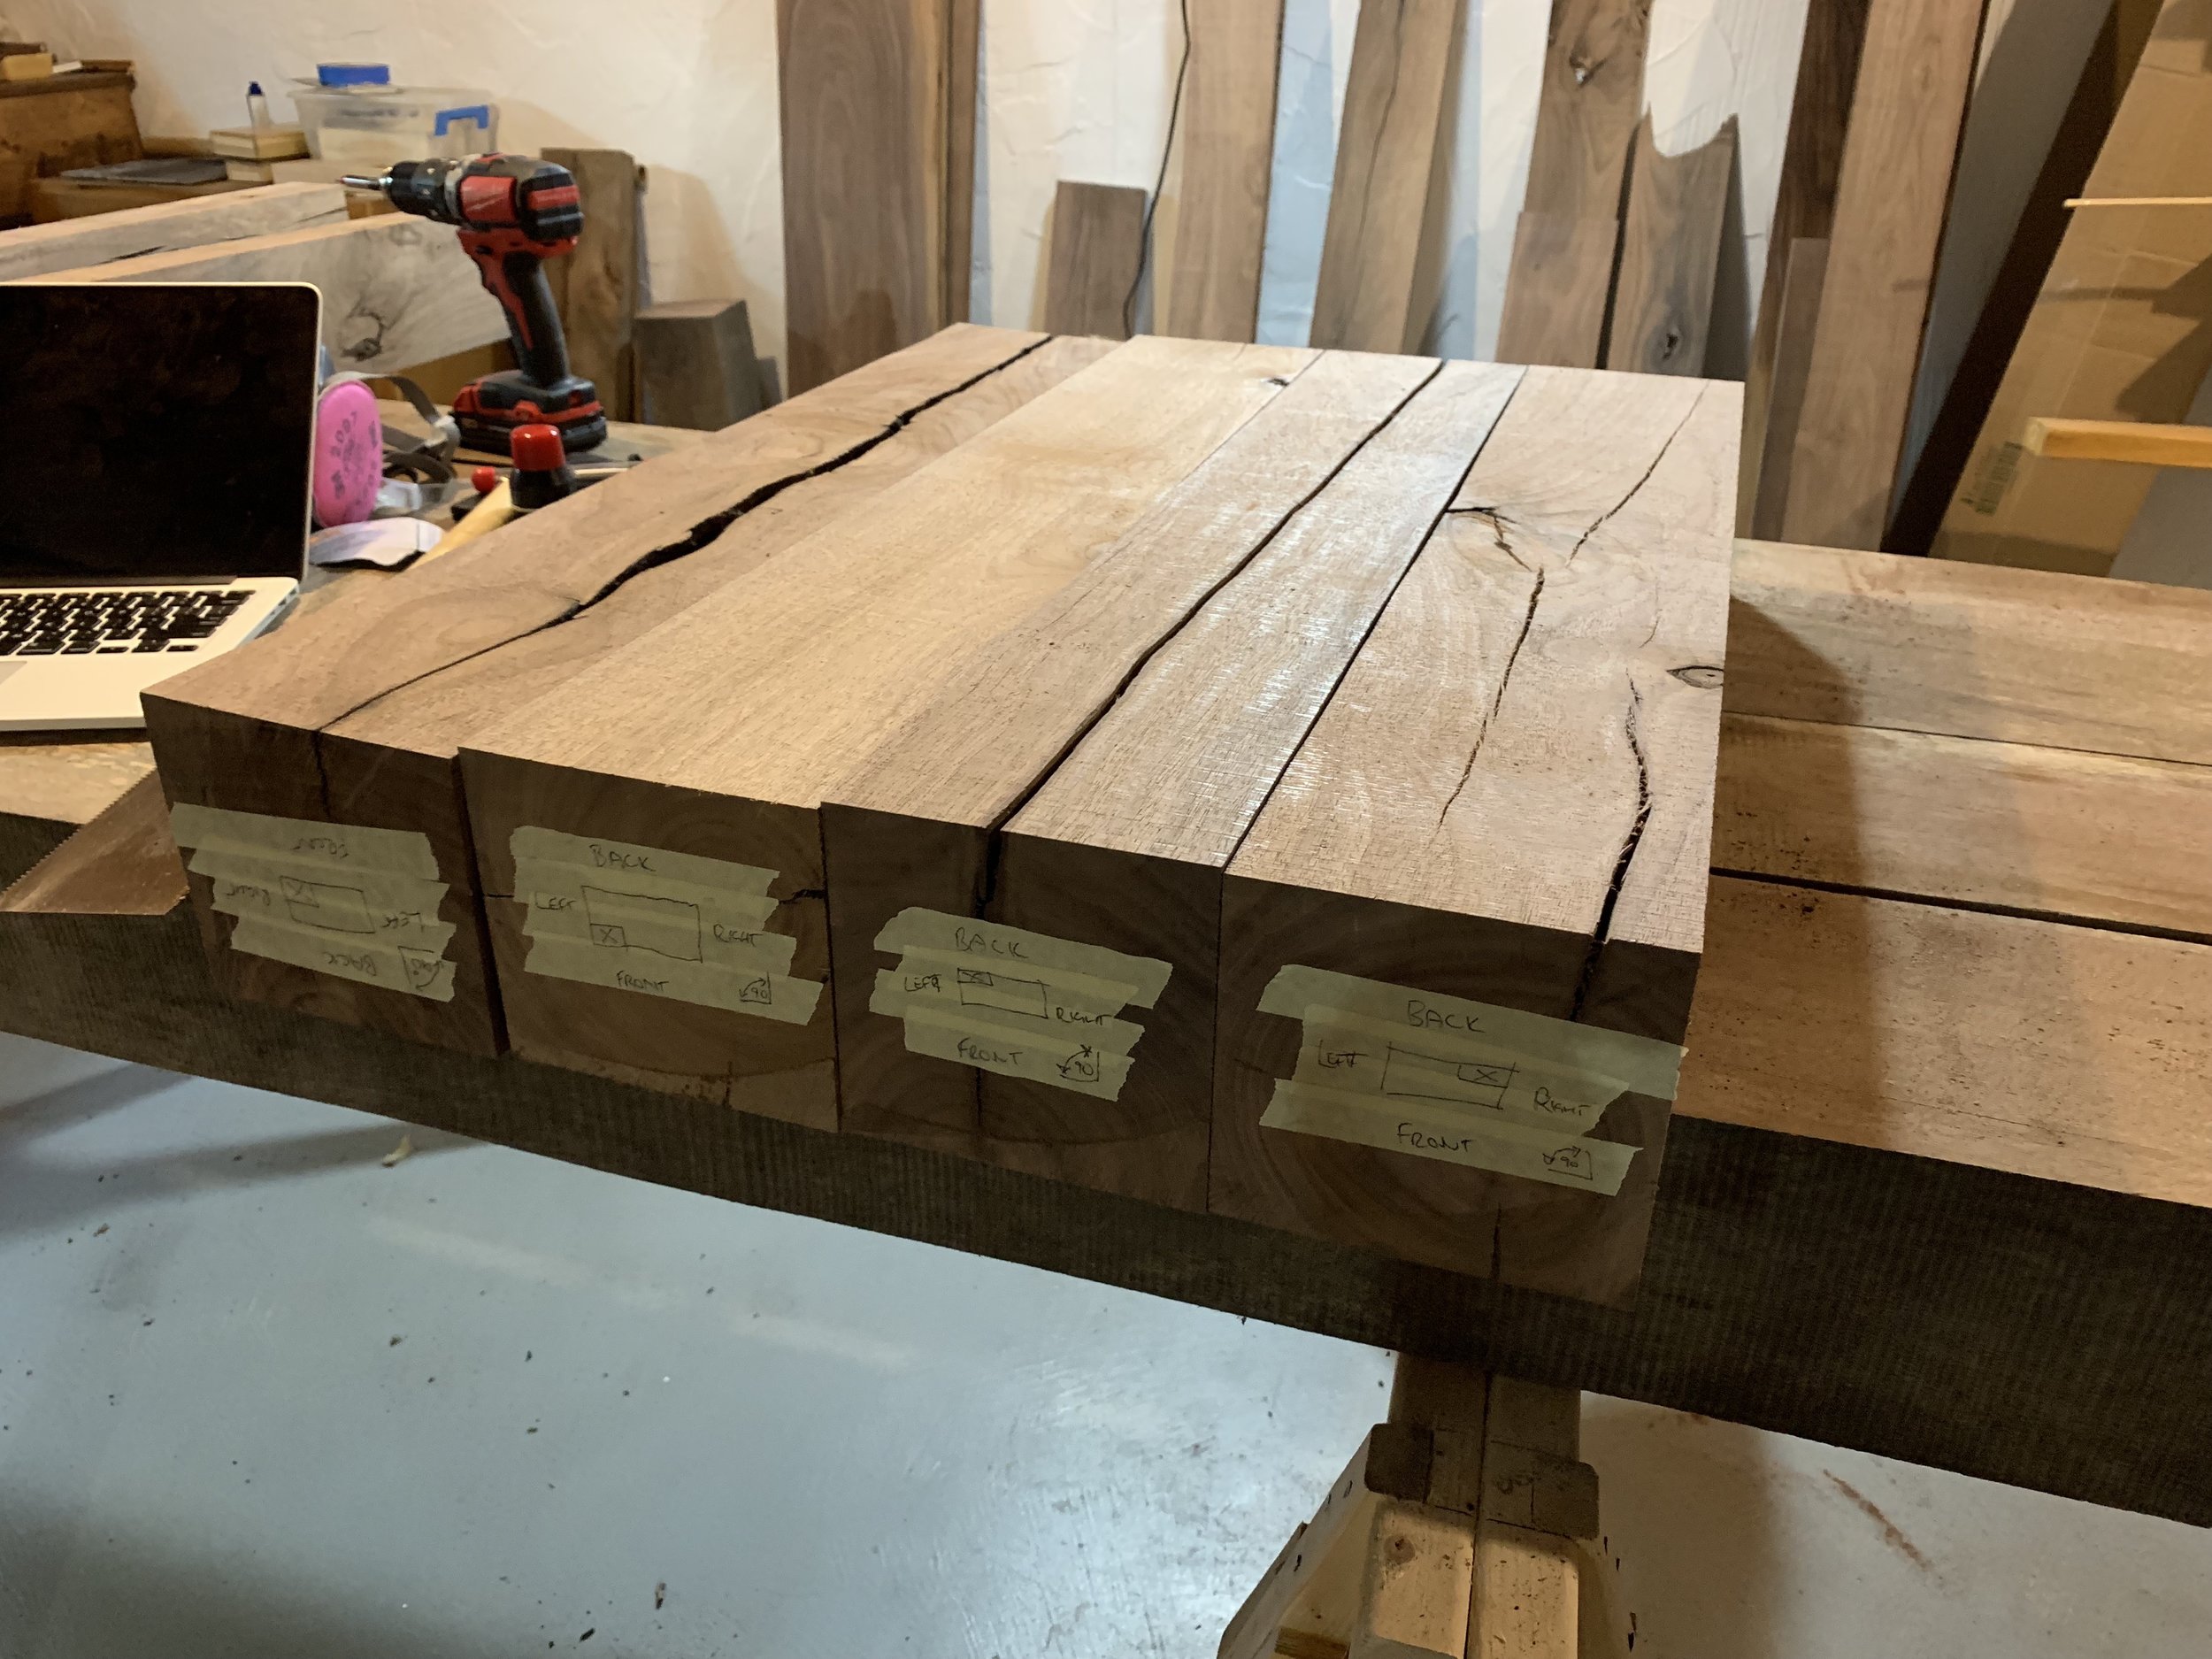
One weekend at a time… Legs and stretchers have all been milled down to their final dimensions. A couple of the legs are structurally compromised and will need some reinforcement. Initially I had planned on using a combination of dutchmen keys and epoxy but I think I’ll pivot and use 3/8 brass rods and epoxy. I’m afraid chisel and hammer work will crack the legs further, so the brass rod approach seems like a safer bet. Still haven’t touched the beams for the top… perhaps next month.


Beams to Dreams
It’s time to get started. No more planning, no more thinking and hopefully no more tooling up. First order of business is to start cutting my beams down to size. Though it’s not as straightforward as it might appear. I’ve learned a few things about buying wood, some which I already knew but didn’t quite register with me. I guess i’m an experiential learner… 1st off, country folk are savvy and you should drive a hard bargain. I still can’t decide whether I got a good deal… On one hand, walnut beams are exceedingly rare and should cost a small fortune. On the other hand these beams have checks, pith, debris and the tree ate a small fence and a few lag bolts back in 1982. All in, I probably did very well, especially considering I wouldn’t have been able to buy the same amount of wood in ash or oak from the local hardwood supplier for any cheaper. Actually it would have been close to double. The trade off is that I had to dig metal out of a few beams, I’ll have take care to mill the pith out where ever possible and I’ll probably end up having more dutchmen than than the Netherlands.

It took a bit of rotisserie but the bosch glide got it done.
Used a mdf sled to get straight and true edge.

Hot damn, it actually worked!

Legs were looking a little hairy and needed a shave.

I wasn’t kidding about the pith & checks. I might need to drown those dutchmen in epoxy.

proto-roubo | walnut-henge
An Industrial Revolution
The machine shop side of the workshop is complete. Ducting has been run and the sub-panels in. I won’t go into too many of the details as it was more of a hassle than anything else. Numerous trips to home depot, rona, lowes, to purchase all manner of ducting, fittings, screws, hose clamps tape, in various diameters, gauges and orientations. But it’s in and I have enough parts left over to build a small space station. Nasa, look me up if you’re reading this.


A French Connection
I’ve been deep in the minutiae of workbenches for some time now, it’s been one of more extensive rabbit holes I’ve travelled down. I’ve poured over all the books, have read countless build threads and I think I’ve reached a point where I have a clear idea of what I want for my own. Initially, I was really drawn to Chris Schwarz’s cherry slab roubo, to my eye’s it was just about perfect except it was a little on the small side. It has a purposeful honesty about it, whereas the more popular “benchcrafted” style benches come across as more cold and clinical. My plans changed when I stumbled across 1stdibs.com, which is a veritable treasure trove of workbench design ideas. And it was there where I found it, a french bench with perfect proportions, a design which sang to me across the centuries, and It’s the one I will build. It differs from the modern roubo interpretation in a few ways. Its front stretchers are inset and not flush, It has drawers, lacks the dovetail tenon and has an overall wider stance than most. I’ll need to make a few modifications of my own, I’ll add upper support stretchers , a quick release tail vise, a shelf to the underside and will thicken the top somewhat. It feels good to be able to stop searching, no more endless research, it’s just time to build.

Christopher Schwarz’s Petite Cherry Roubo

The French Bench


A quick sketchup plan
Progress Slowly
If all goes well the shop should be up and running in a couple weeks. An electrician will be by to install a 100amp sub-panel tomorrow, which leaves me with the dust collection ducting to figure out. Haven’t quite decided on whether to use 24g stove pipe single wall duct or to go with sewer piping. The sewer piping is difficult to find around these parts, it seems 6” diameter is only sold wholesale to the plumbing trades…
I’ve landed on machine placement, the layout below seems to have the best feng-shui, however these things tend to change in practice.
Once complete it’ll be time to start prepping stock for the roubo build.


First Steps
I managed to drag two of the six walnut beams into my shop yesterday. A few passes with a hand plane gave me my first look at what was waiting for me. A few checks and cracks but nothing that can’t be stabilized. Moisture is a little on the high side but it’ll come down over the next few weeks. Building this Roubo will be an exercise in timberframing before cabinetry. I still have a lot of decisions to mull over… face or edge grain for the top, cabinets below or open space… who can I trick or bribe into helping me rip them down on the bandsaw.


