I’ve been building this bench for so long that I’m a little sad to see it come to an end. It strange, usually projects tend to drag towards the end but this one really accelerated, so apologies for cramming a lot into this last update.
It’s been a challenging build but also a rewarding one. What i’ve liked most is that some elements have just fallen into place. The asymmetry in the top was dictated by the size of stock I had on hand. The two piece top was made of 4 beams, one was a good 7” wide and the rest were a little smaller. I used the 7” piece for the front as it was widest and it didn’t make sense to rip them all to a common width just to have the centre gap land right in the middle. I actually really like the fact that the work surface at the front totals 13” at the front and just over 8” at the rear. I also really like the fact that the 7” beam worked out to be exactly the same width as my sheldon vise. This really helped with the installation. The material for the legs had its fair share of structural defects, but all were addressed through epoxy reinforcement. It worked out to be kinda neat that I had enough material for 4 gnarled legs and 1 clear top. Without getting too mystical, in some ways i feel the bench build itself. Or at least dictated its final form. Anyways, on to the picture show.

The top was a bear to trim. I was able to make a kerf cut with my track saw but i still had 3” or so to hack through.

Man this was tough work. I nicked my fingers several times with this Ryoba, should have taped the edges….

I used miller dowels to secure the ledgers for the bottom shelf. Didn’t have to but if anyone ever looks up my skirt they’ll see a craftsman.

Next, on to the shelf boards. The veritas small plow is a finicky beast, can’t say i’ve mastered it but i was able to fiddle with it enough to get it plow an acceptable tongue and groove.

I find this type of work to be some of the most pleasurable. Light chamfering with an apron plane and a chisel.

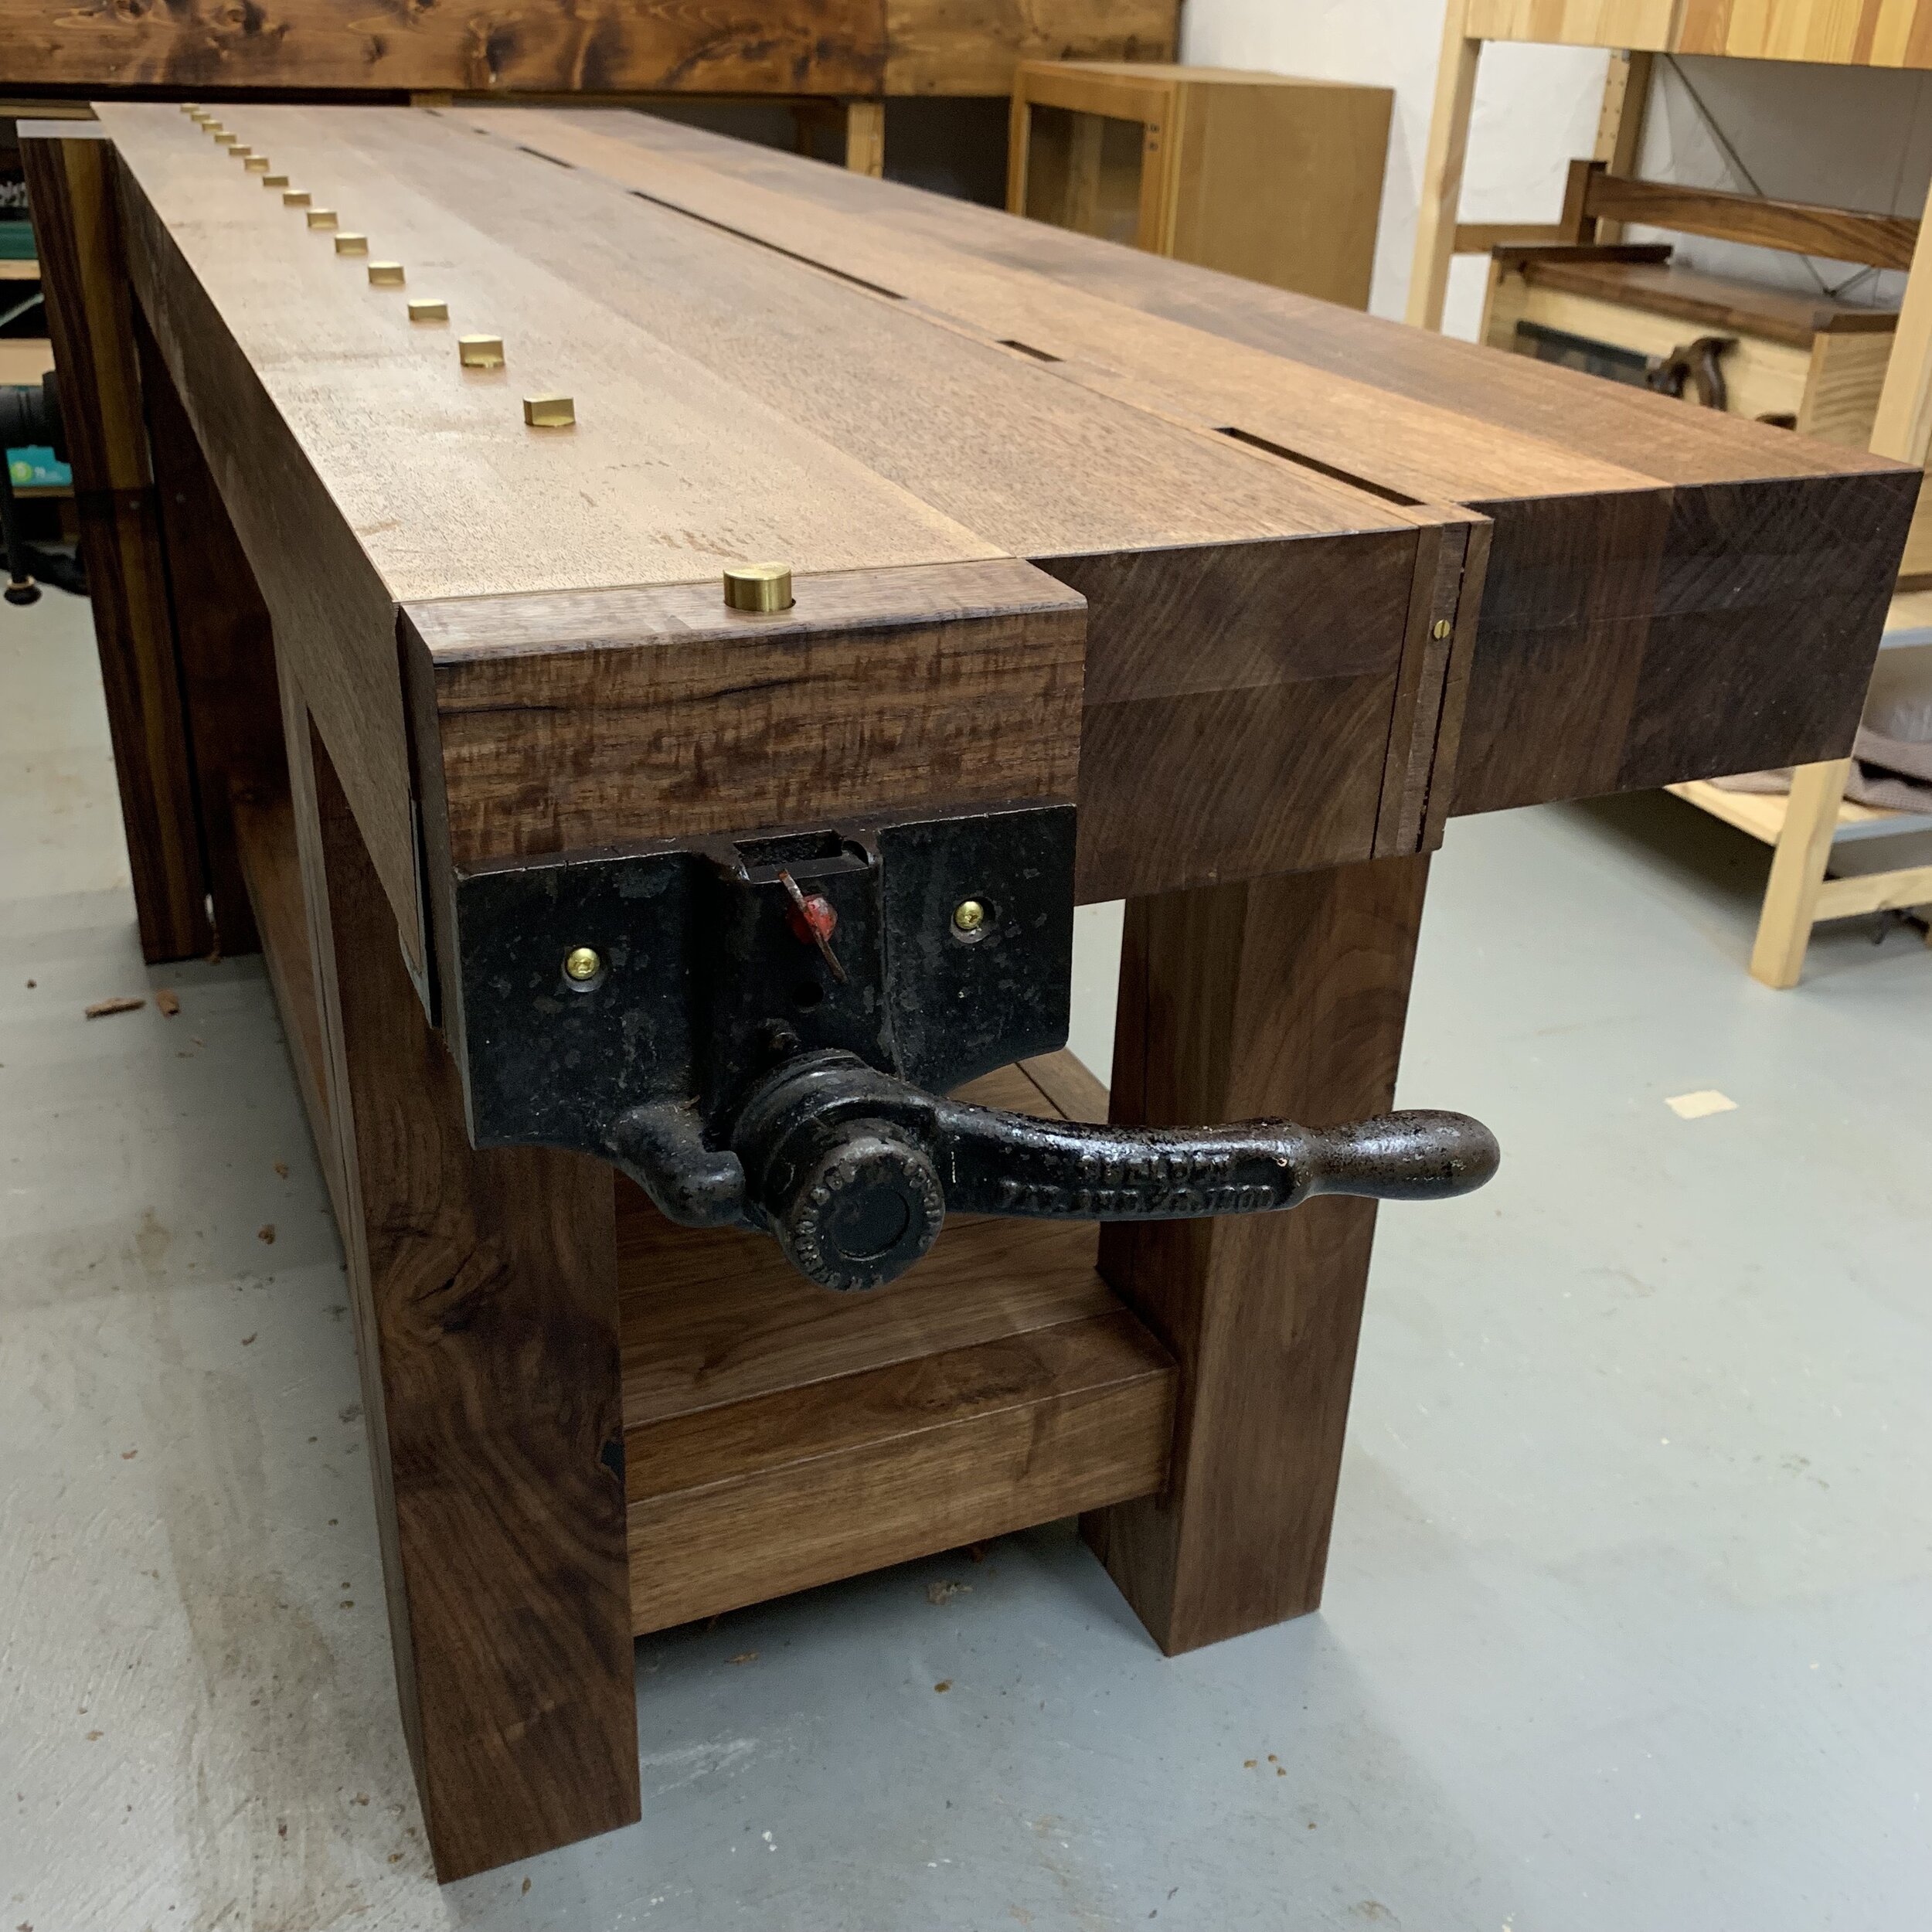
Here she is, in the raw. Still needs a good danish oil bath and a few dog holes.

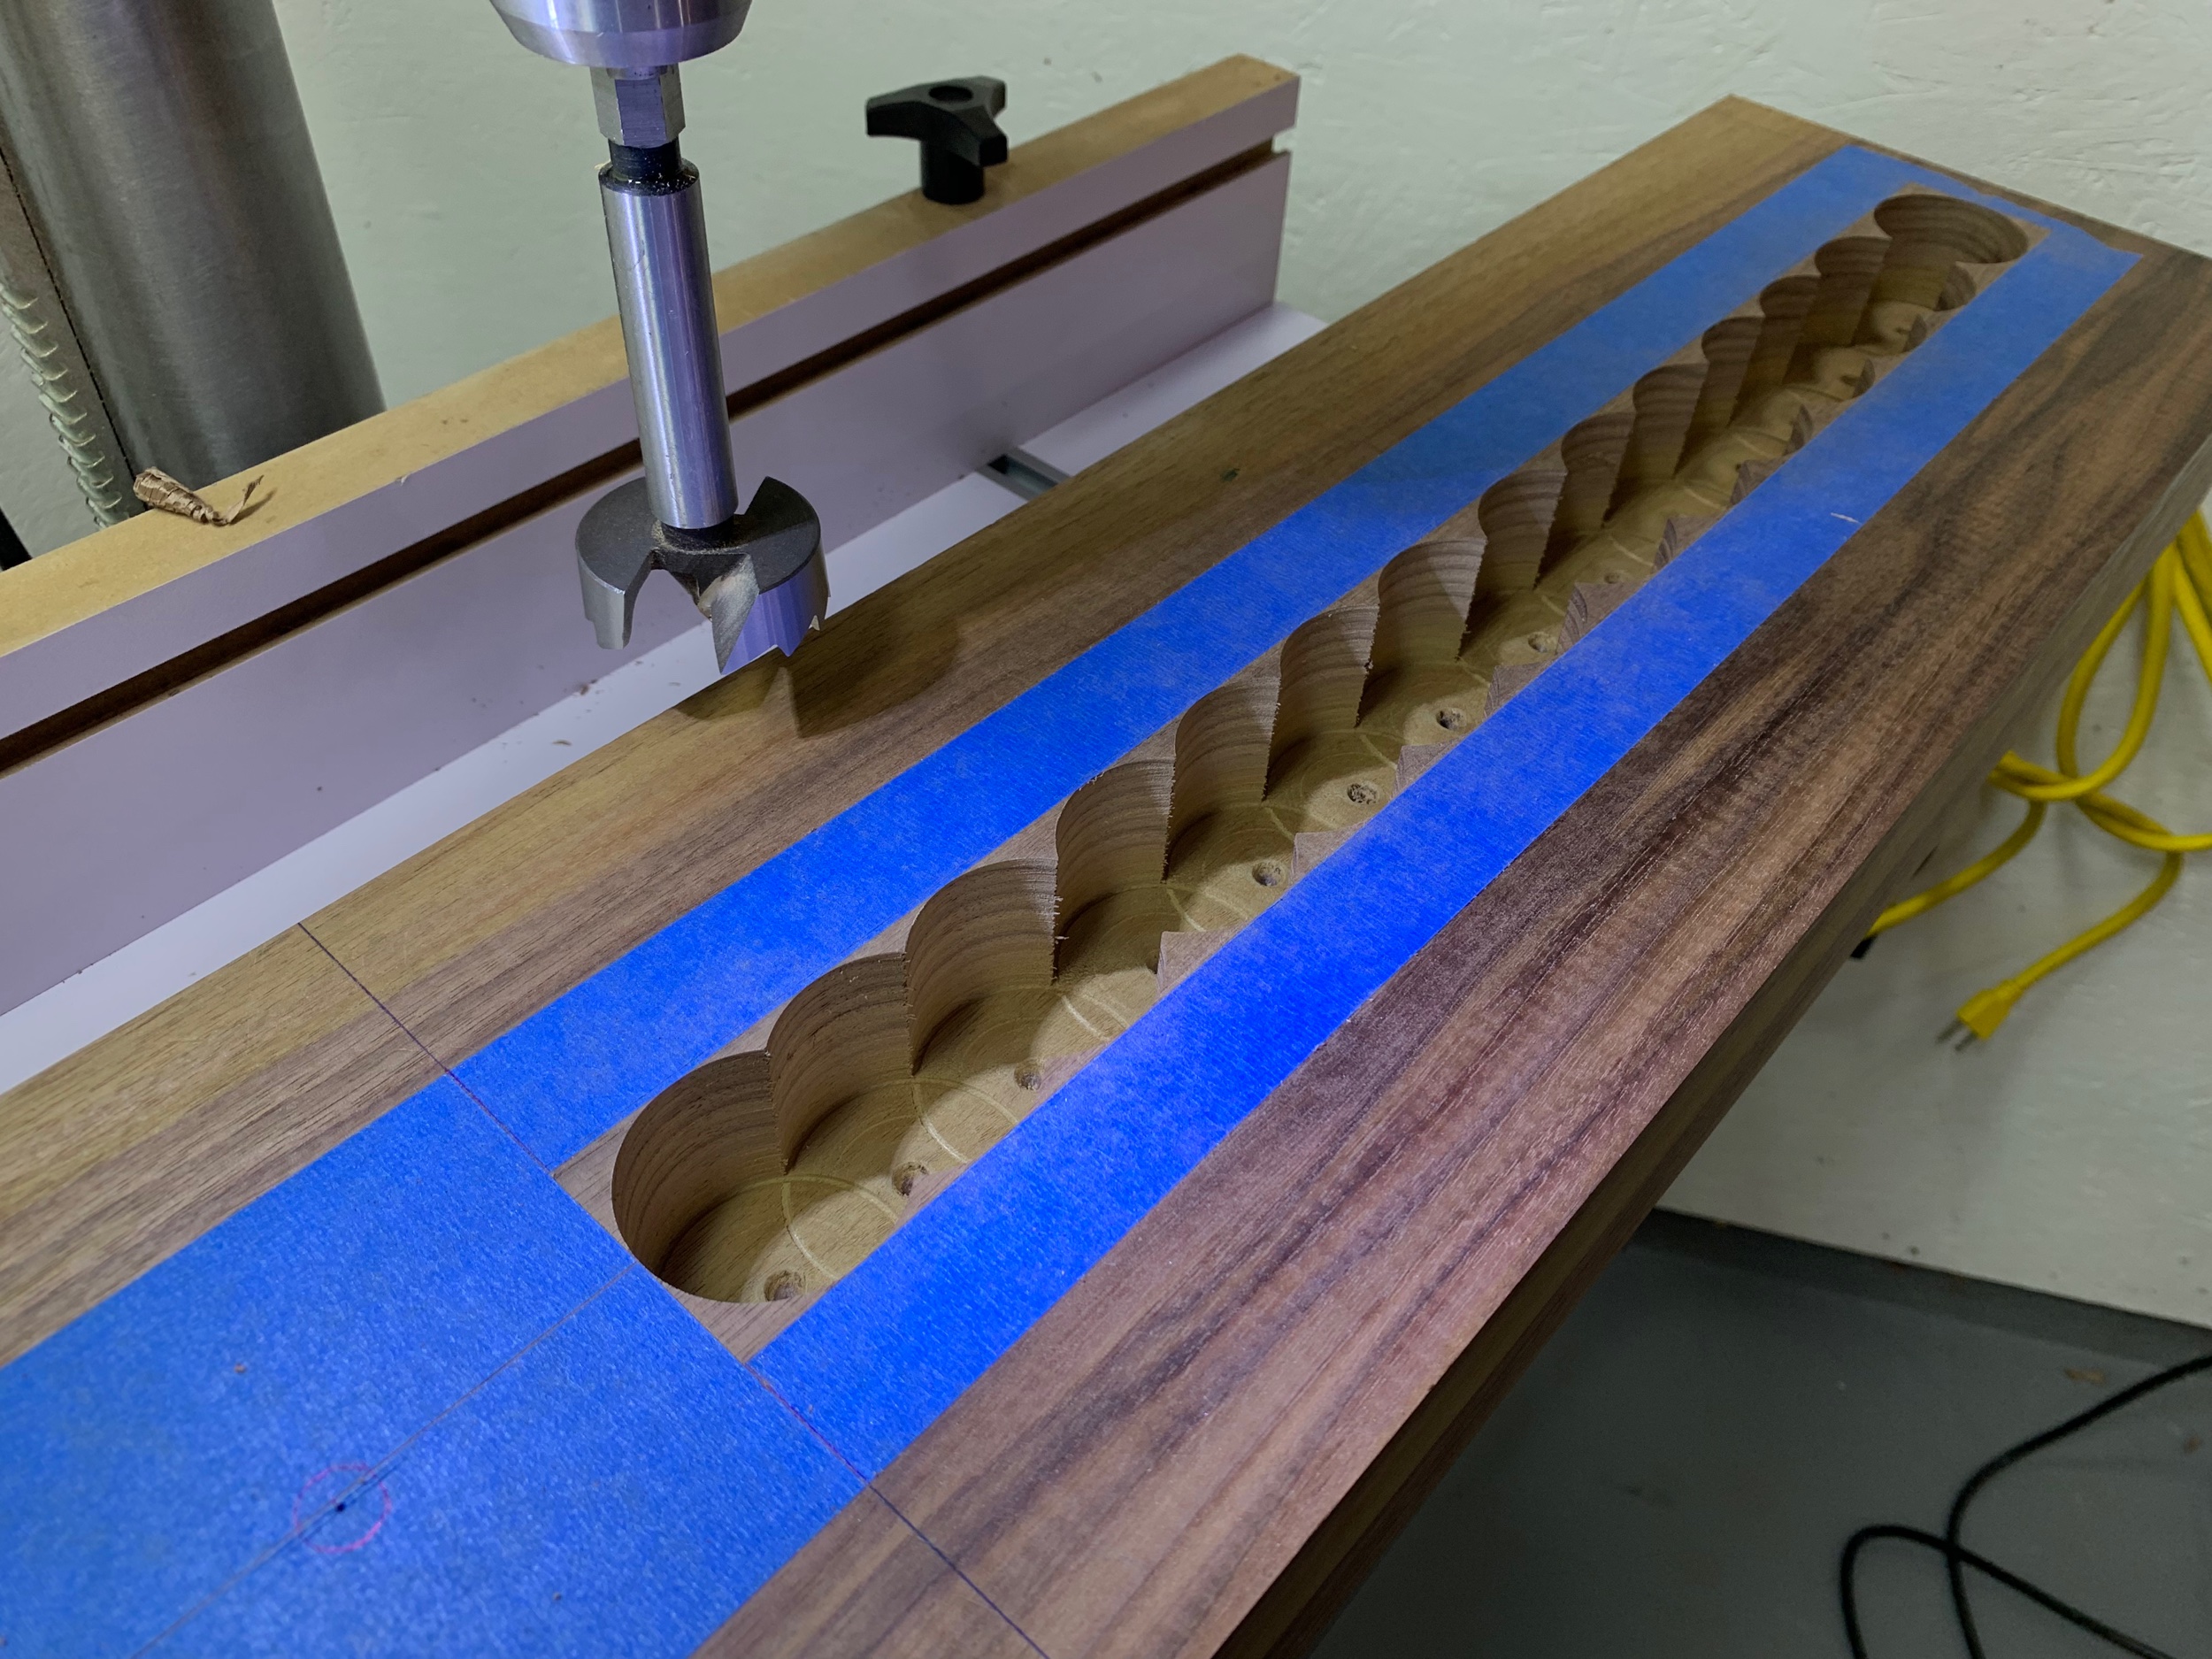
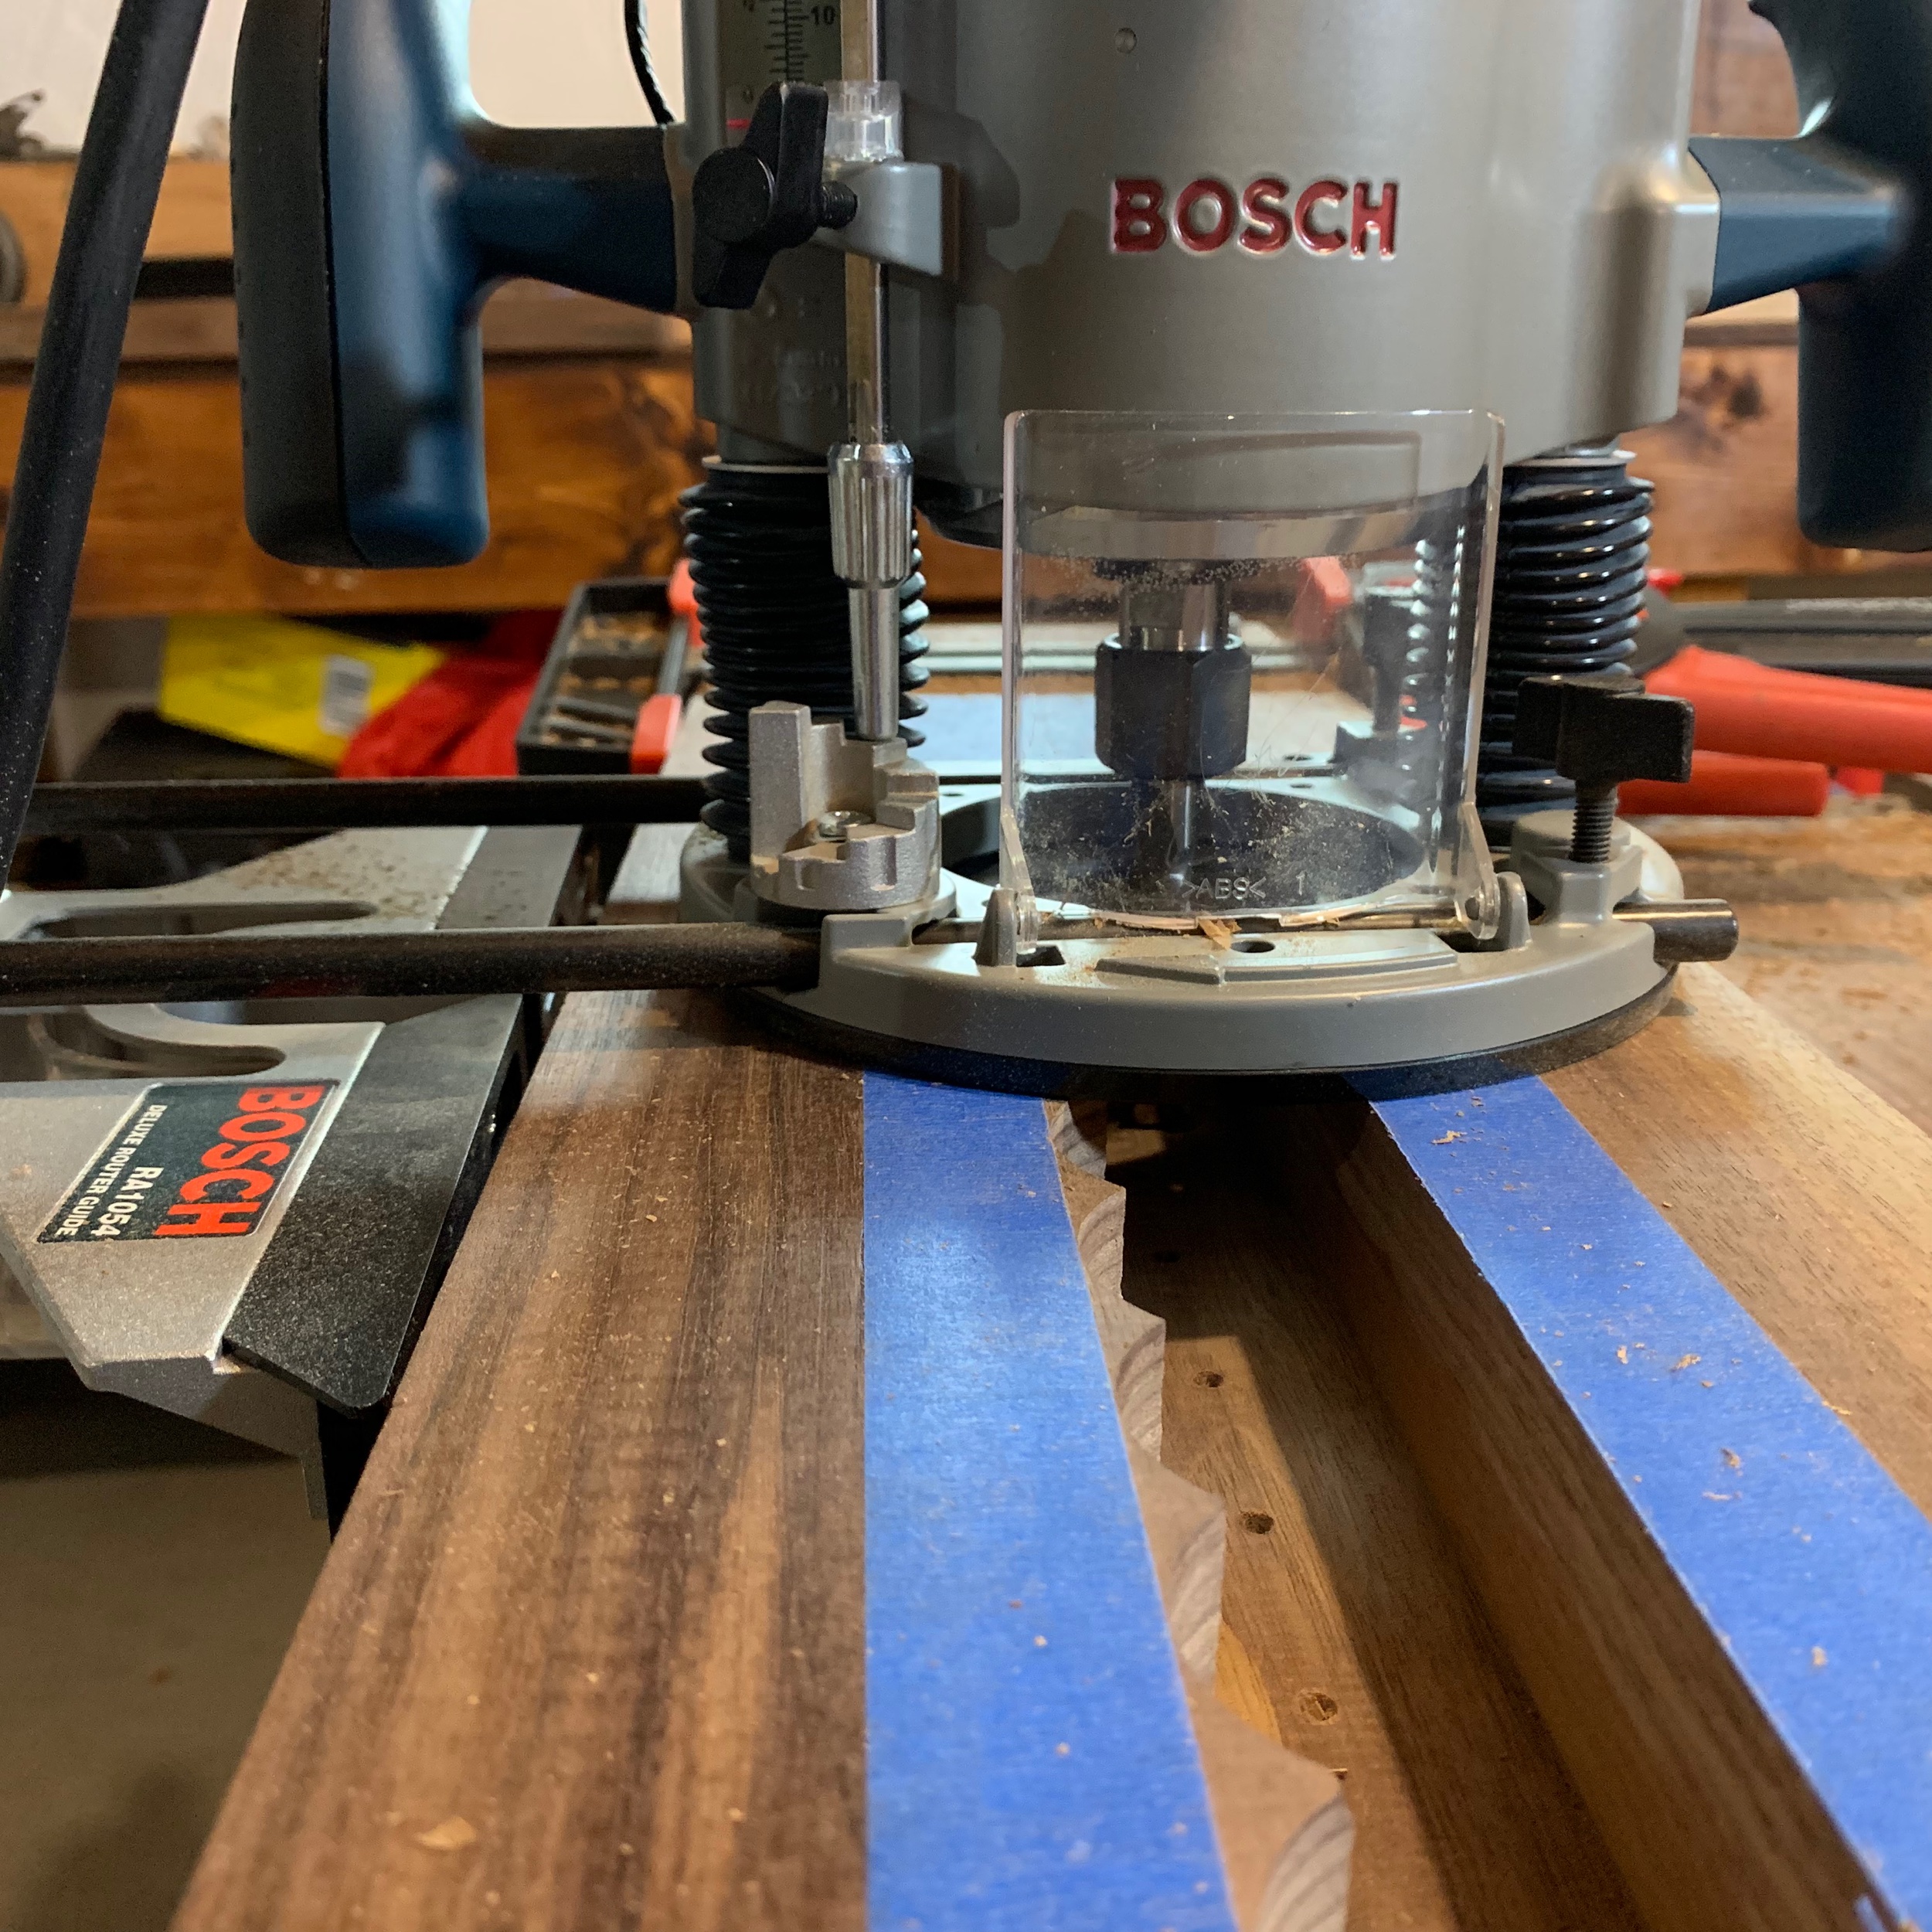
Made a quick jig to drill the dog holes straight and true. Lee valley sells this 3/4” brad point bit and 1” bushing, they make things easy.


On to flattening. You can see here the front beam lamination was slightly proud. All in all everything was sitting relatively well and it didn’t take too long to get things dead flat.

Full length shavings tell me I’ve found true flatness.

And when everything’s said and done here she is.

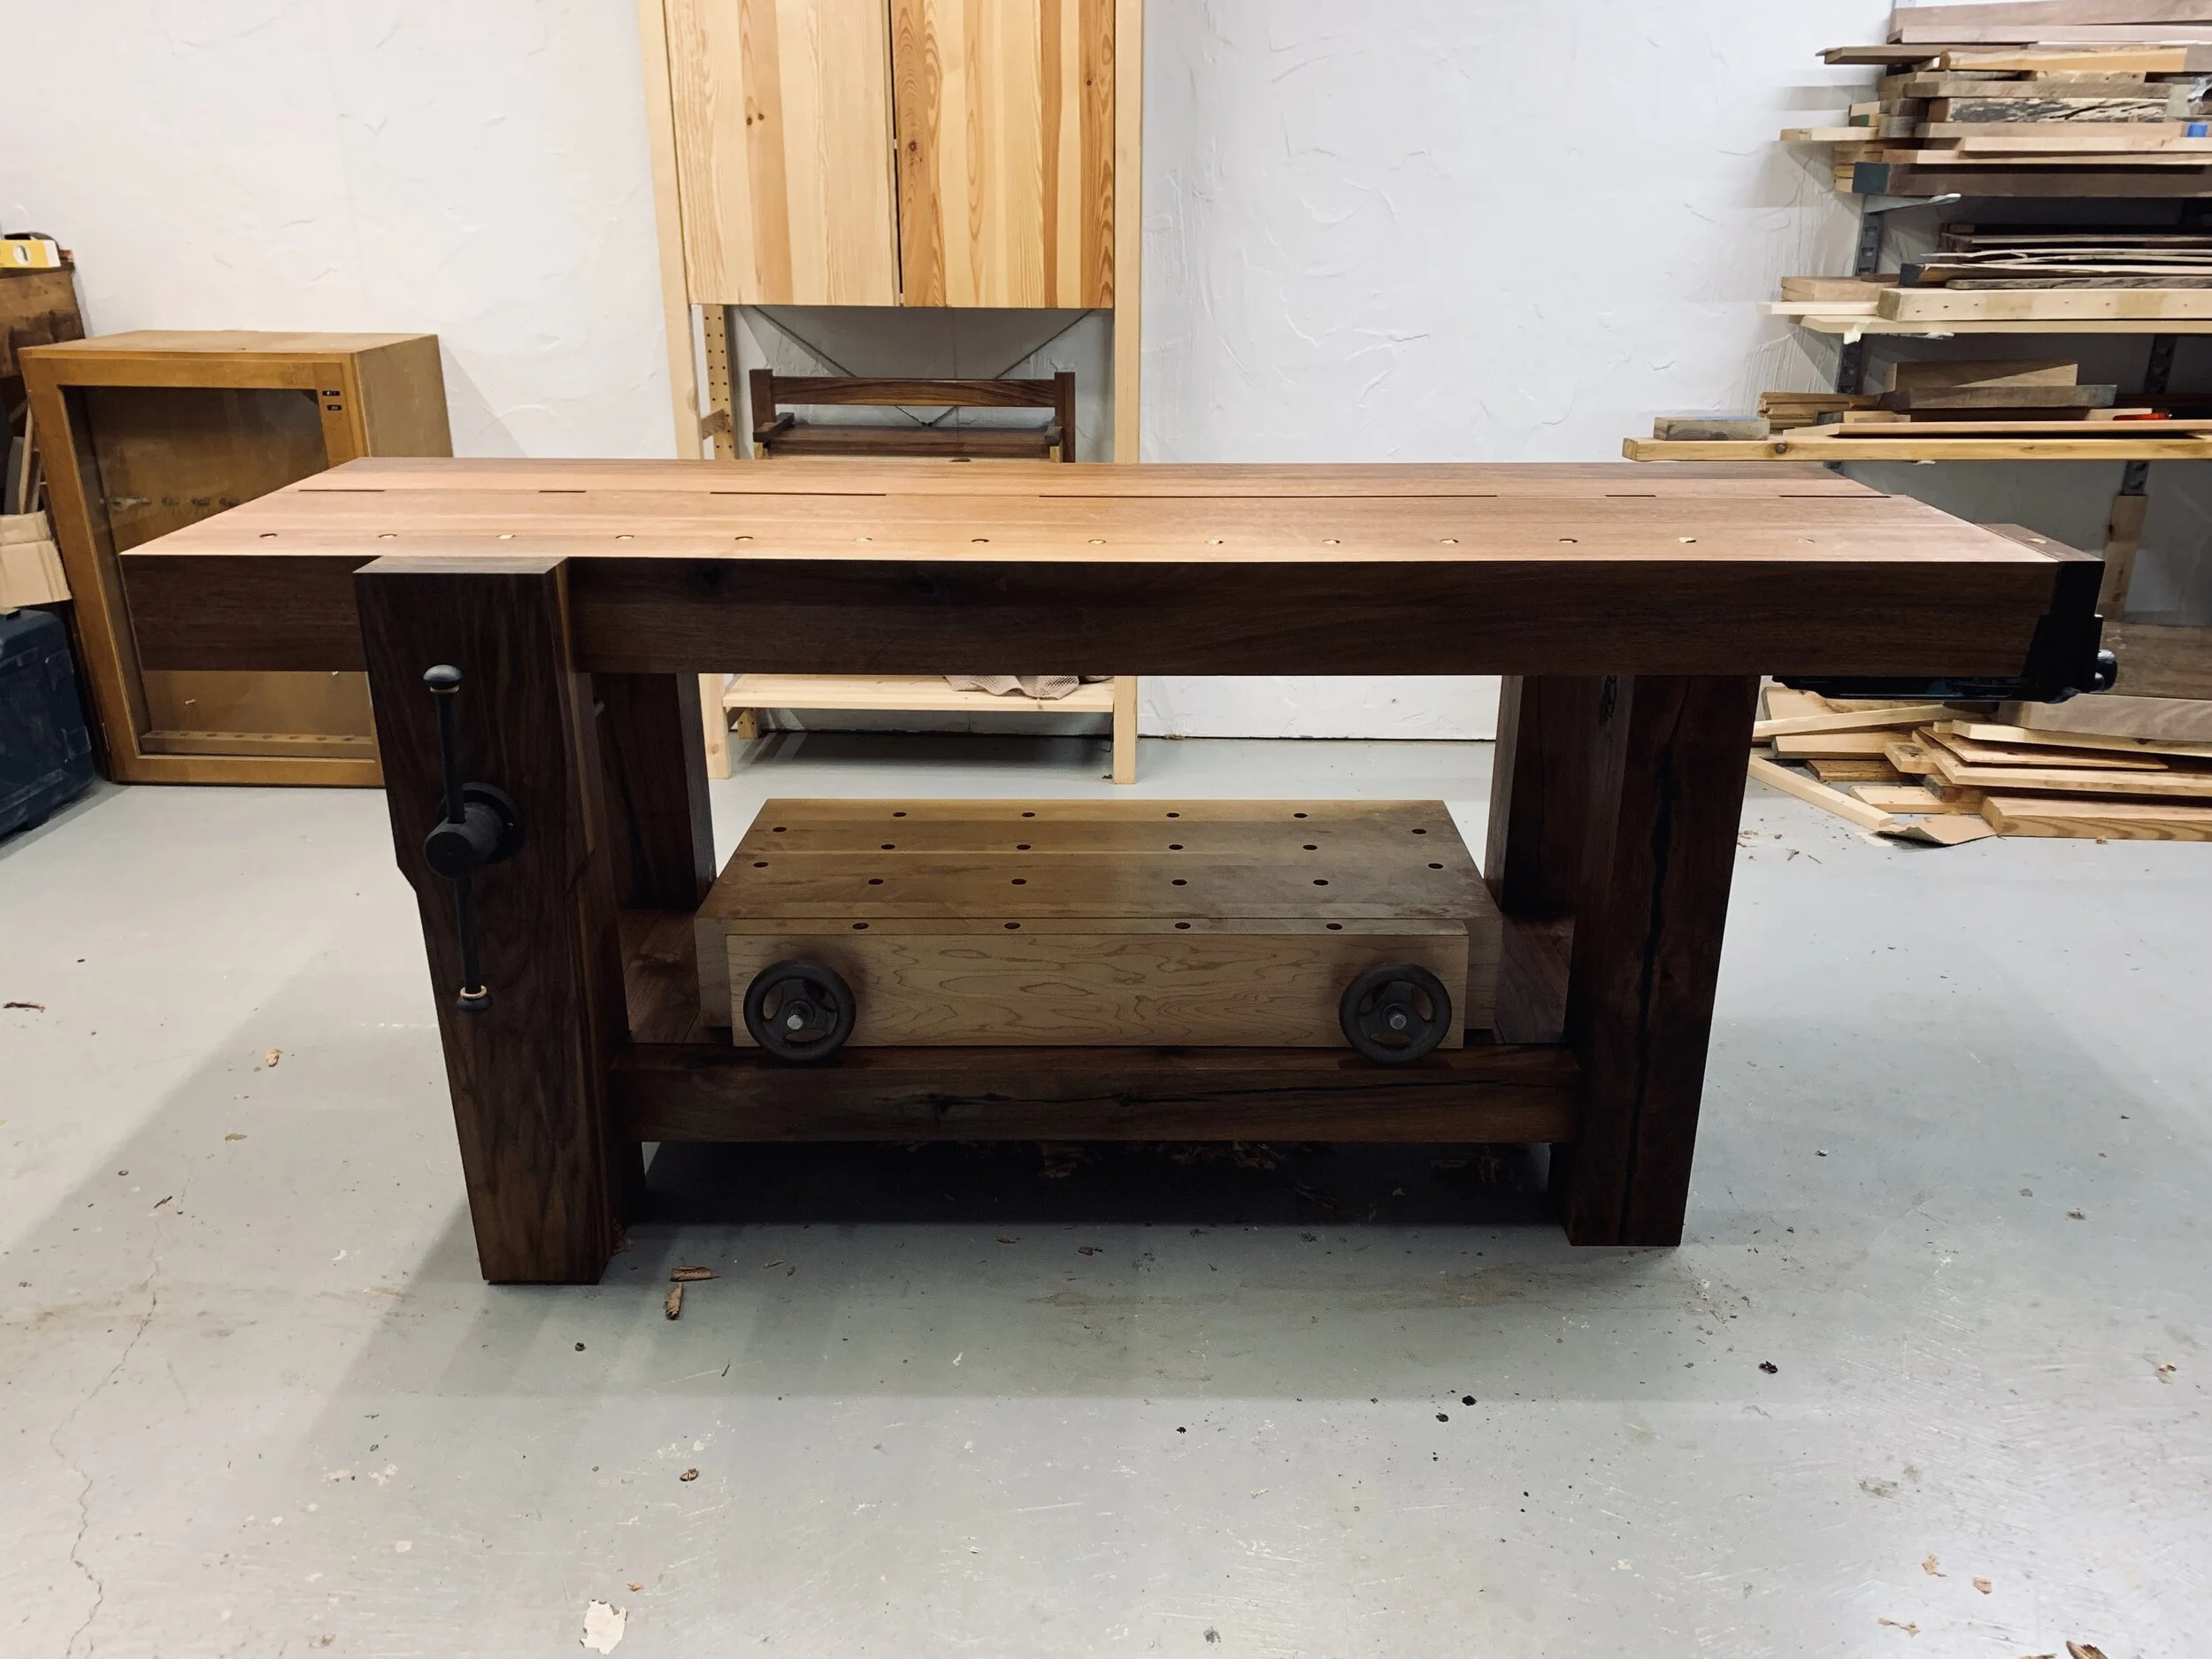
Another roubo workbench enters the world, built with wakened hands & built for a lifetime or two.